
This article provides the steps necessary for creating a Plan.
Create a Plan
Overview
Prerequisites
It is recommended that the following tasks be completed before you begin to create Plans. At a minimum, we suggest that you:
- Create a Service
- Create a Usage Type (if applicable)
You may also find it helpful to create Product Fields, Product Field Categories, Account Fields, General Ledger (GL) Codes, and Tax Configurations before creating a new Plan.
Creating a Plan
Getting Here: Click Products > Plans

- Click New.
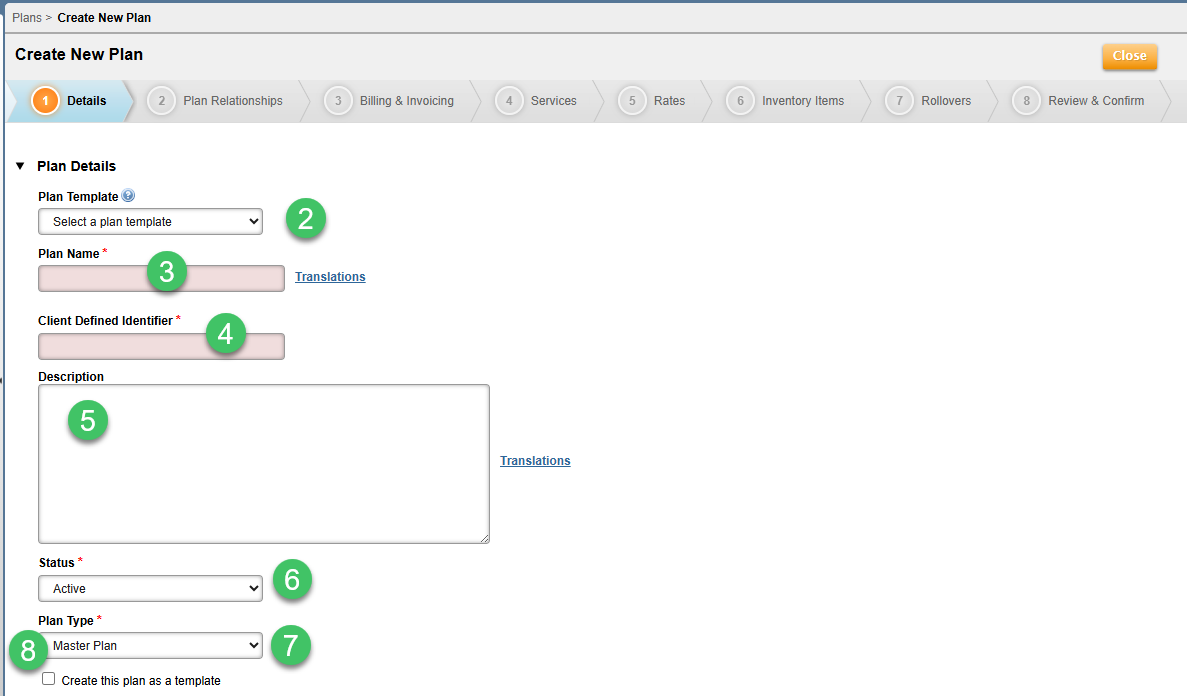
- To use an existing Plan template, select the appropriate template from the Plan Template drop-down.
Note: Plan templates may be saved for reuse by selecting the Create this Plan as a template box within the Plan Details section of the screen.
- In the Plan Name field, enter a descriptive name for the Plan.
Note: Fields marked with a red asterisk are required.
- A Client-Defined Identifier auto generates based on the inputted Plan Name. However, you can change Aria's auto-generated client-defined identifier as needed to support your own business needs.
- In the Description field, enter any useful details about the Plan.
Entering a meaningful description is important as it provides your users with Plan-related information that may help them quickly distinguish this Plan from others.
- From the Status drop-down:
- Select Active to make the Plan available for customers to subscribe.
- Select Inactive to make the Plan unavailable for customers to subscribe.
Note: Once you create an Active plan, you can change it to Inactive if no accounts have subscribed to it. Go to Products > Plans and find the plan you want to update. A "lock" symbol in the Actions column indicates the plan is in use by an account and you cannot edit it. A red "X" indicates the plan is not in use by an account, so you can mark it Inactive or modify its other characteristics.

- From the Plan Type drop-down, select Master Plan or Supplemental Plan.
- Select the Create this Plan as a template box if you wish to reuse this Plan as a template in the future.
Note: If you have have created/configured Product Fields and Product Field Categories, these will appear at the bottom of the Plan Details Page for applicable assignments to Plans.
Click Next: Define Plan Relationships.