
Note: The Account Hierarchy-Master Plan Instance Visualization Configuration functionality is an optional tenant setting. Contact Aria's Customer Support team to enable this functionality for your Aria tenant.
Omni-node Account Hierarchy Configuration
Overview
If you use, or plan to use, Aria's omni-node account hierarchy to facilitate an account "family," you can customize the graphical representation of account hierarchies. An organizational tree representation of an account family allows you to navigate related parent and child accounts, viewing details you specify in informational cards.
Enabling a Role/User To Configure Hierarchy Visualization
Getting Here: Configuration > Security > Roles

- Click New OR on an Existing Role

- Click on the Read and Edit check boxes next to Hierarchy Configuration within the Configuration > Client Settings section of this page to enable this Role to access and configure Hierarchy Configuration. Remember to click on the Save button at the bottom of the screen to effect this Role change.
Note: For information on assigning users to a role, see Assign a User to a Role.
Configuring Account/Master Plan Instance Hierarchy Visualization
Getting Here: Configuration > Client Settings > Hierarchy Visualization

The Hierarchy Visualization screen provides options for configuring the display of internally defined fields, and client specific account and/or product supplemental fields on Account and Plan cards.
Note: Selected options are automatically reflected in the sample account and Plan cards on the right as a visual reference.
Account Cards
- Click on the Title field's drop down arrow to select the title or top line that will display in the blue section of the account card. Options include:
- User ID
- Account Contact Company
- Account Contact Full Name
- Account Number
- Use Account Field

- Selecting Use Account Field displays a screen popup to select a customer-defined account field to display in the Title area of the account card.
Note: For information on creating an account field, see Create Account Fields.
- Click on the Subtitle field's drop down arrow to select the subtitle or second line that will display in the blue section of the account card. Options include:
- Payment Responsibility
- Account Contact Company
- Account Created
- Account Number
- Account Start Date
- Status
- Use Account Field
- Click on the Left Body field's drop down arrow to select the left body detail that will display in the white section of the account card. Options include:
- Currency
- Days Past Due
- Full Balance
- Plan Instances
- Unapplied Service Credits
- Use Account Field
- Click on the Right Body field's drop down arrow to select the right body detail that will display in the white section of the account card. Options include:
- Full Balance
- Days Past Due
- Full Balance
- Plan Instances
- Unapplied Service Credits
- Use Account Field
- Click on the Details Flyout tab to configure settings for the account card's View Details flyout.
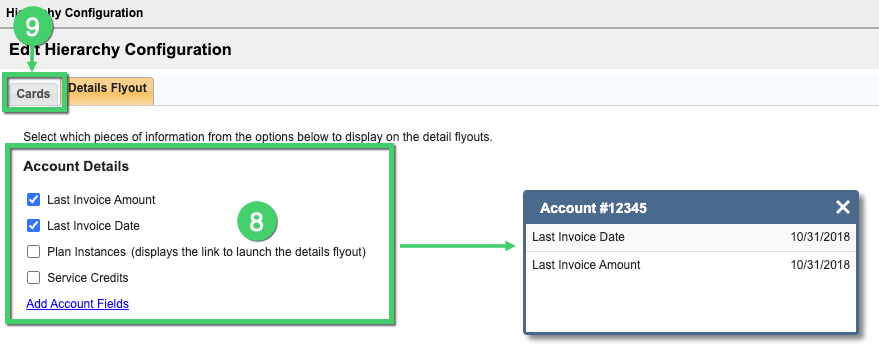
- Click on the various Account Details option's check boxes to include on the Account Card's View Details flyout.
- Click on the Cards tab to return to the main Hierarchy Configuration screen.
Plan Cards

- Click on the Title field's drop down arrow to select the title or top line that will display in the blue section of the Plan card. Options include:
- Plan Name
- Client Defined Identifier
- Instance Description
- Plan Number
- Use Product Field

- Selecting Use Product Field displays a screen popup to select a customer-defined product field to display in the Title area of the Plan card.
Note: Only Product Fields configured for Plan objects and " for a specific instance of a Plan assigned to an account" are supported. For information on creating a product field, see Create Product Fields.
- Click on the Subtitle field's drop down arrow to select the subtitle or second line that will display in the blue section of the Plan card. Options include:
- Plan Number
- Instance Description
- Status
- Use Product Field
- Click on the Left Body field's drop down arrow to select the left body detail that will display in the white section of the Plan card. Options include:
- Plan Units
- Current Balance Due
- Days Past Due
- Full Balance
- Rate Schedule
- Use Product Field
- Click on the Right Body field's drop down arrow to select the right body detail that will display in the white section of the Plan card. Options include:
- Rate Schedule
- Current Balance Due
- Days Past Due
- Full Balance
- Plan Units
- Use Product Field
- Click on the Details Flyout tab to configure settings for the Plan card's View Details flyout.

- Click on the various Plan Details option's check boxes to include on the Plan Card's View Details flyout.
- Click on the Save button to effect your changes.