
Account Overview
Overview
The Account Overview page is where you will land from the Account Search. Look through the overview elements below to familiarize yourself with where to find account infomation.

- At the top of any page in CCP, you will see the navigation path leading to the current page. The displayed navigation path below is Accounts > [account number] > Overview
- Parent and Child Accounts associated with the current Account can be viewed from the dropdown arrow next to the Account holder's name.
- Status of the Account is displayed to the right of the Account holder's name. Any of the following Account Statuses may be displayed here:

Account is in good standing. 
Account is not operational. 
Everything under the account status is disabled and all plan statuses are terminated. 
Account is temporarily banned. However, there is no effect on account billing. 
All plans under this account are never invoiced. 
Account has been registered via UI, but either account contact has not yet responded to an account activation email, or some other validation needs to occur. Note: Visit Account Statuses page for more details about Account Statuses.
- You can view the Past Due Balance, Payment Awaiting Application, and Unapplied Service Credits by selecting the dropdown arrow to the left of the Total Account Balance. Once you have made a selection here, CCP will remember your selection for the next time you log in.
- In the upper right side of the Account > Overview page is the Total Account Balance. The total account balance is displayed by default.
- To the right of the Total Account Balance is a Make Payment button which allows you to make a payment directly from the Account Overview. See Payments to learn more about making payments.
- Switch between the Account Overview and Payment Methods tabs to view basic information about the Account and available Account Payment Methods.
- The blue overview card at the top of this Overview tab displays general account information like the Account Balance and Next Bill Date.
- Select the expander at the bottom of the Overview section to see more Account related details. Click the expander again to hide the Account related details. Select the drop down arrow at the bottom of the blue overview card to expand more Account Details.
- The Account Overview sub-tabs can be found here. Switch between Subscriptions, Recent Activities, and Hierarchy to view information about the Account.
- This area displays the information found within each sub-tab.
Below the overview card are sub-tabs that allow you to quickly view the account's Subscriptions, Recent Activities, and the Account Hierarchy.
Subscriptions
Select the Subscriptions sub-tab from Accounts > Overview to view a list of the account's Subscriptions and their details. You can filter through an Account's Subscriptions by selecting a column heading. You can also expand a Subscription to view more details about it.
Note: The following terms commonly used in Aria Billing are now associated with new CCP terminology as shown in the following table.
| Aria Billing | CCP |
|---|---|
| Master Plan Instances | Subscriptions |
| Supplemental Plan Instances | Add-Ons |

Recent Activities
The Recent Activities sub-tab within the Account Overview screen allows you to easily access up to date Account information and your most recent account activity.

Invoices
To view a list of recent invoices for the selected Account, open the Overview screen then select Recent Activities. From the dropdown menu choose Invoices. A list of invoices will populate starting with the most recent.

- Select the dropdown arrow to the left of an invoice to expand view information related to the invoice like Line-items, Transactions, and Statement.
- Select the row actions ⋯ to the right of each invoice line to view options for the selected Invoice.
- Selecting View/Print will open a pop-up preview of the Invoice and allow you the option to print the Invoice (the invoice will display based on the selected invoice template added to the account).
- Selecting Download will save a copy of the selected Invoice to your computer.

Transactions
To view transactions for the Account, open the Overview screen then select Recent Activities. From the dropdown menu click Transactions. A list of recent Account transaction details will populate.
Select the row actions ⋯ on the right of a transaction line to Void a transaction directly from this grid. Voiding a transaction will display a confirmation window where you can specify a reason code and leave a comment. The voided transaction will then be displayed with a red strike through.
Note: Voiding is disabled for refunds and previously voided transactions.

Statements
Statements can be found by navigating to Overview > Recent Activities > Statements. Select the dropdown arrow to the left of a Statement to expand and view a list of transactions that the Statement contains.

Select the vertical ellipses ⋮ on the right side of the header to toggle on and off different data columns from the table. Expand the Show Columns section, and mark the blue check box next to each data column you would like to appear in the Statements table.
These user preferences will be remembered the next time you log in to CCP.
Comments
Comments made on the Account can be found from the following navigation Overview > Recent Activities > Comments. Hover over a comment or comment date to view a more details.

Communications
To view Communications, navigate to the Overview screen, then the Recent Activities tab. Expand the dropdown menu and select Communications.
To resend a communication, expand the message with the dropdown arrow to the left of the subject line. The full message will be displayed along with relevant details. You can edit the email address if a correction needs to be made. Click the Resend Message button. A new communication will be sent and a new record will be immediately created and displayed in this Communications grid.

Account Hierarchy
From the Account > Overview screen, select the Hierarchy sub-tab to view a graphical representation of the account’s structure including any parent or child accounts and their relationships.

- Click on the grid actions ⋮ within each account card to view more details about that account.
- An arrow may appear to the right of the child accounts within the hierarchy diagram indicating that there are additional siblings beneath this parent account. Select the arrow to view more sibling accounts.
- A number beneath a child account indicates there are child accounts beneath that child account. Click on the number to expand the hierarchy further.
- At the bottom of each account card the status of the account is displayed indicating if the account is active, archived, pending activation, or cancelled.
- The hierarchy related to the current account can also be displayed in a list format at any time by clicking the dropdown next to the account holder's name located in upper left of the content area beneath the navigation breadcrumbs.
Custom Fields
Select Account > Overview from the side navigation panel. From the Overview page, select the Custom Fields sub-tab. This tab shows a list of existing Custom Fields that have been created or used for the current account.
Add New Custom Field
Navigate to Account > Overview > Custom Fields. This tab displays a list of the Custom Fields associated with the current account. From here you have the ability to create new fields. Select the Add New Field button.

A pop-out drawer will open prompting you to select from a dropdown list of existing field names and fill out the details about the field you are creating. Remember to save your new Custom Field by clicking Save before closing the screen.

Payment Methods
Select Account > Overview from the side navigation panel. From the Overview page, select the Payment Methods sub-tab. This tab shows a list of existing Payment Methods that have been created or used for the current account.
Add Payment Methods
Navigate to Account > Overview > Payment Methods. This tab displays a list of the Payment Methods associated with the current account. From here you have the ability to create new Payment Methods for the current account. Select the Add New Payment Method button.

A pop-out drawer will open prompting you to enter all of the necessary information for the new account Payment Method you are creating. You also have the option to enter a Billing Contact associated with this Payment Method. Remember to save your new Payment Method by clicking Add Payment Method before closing the screen.

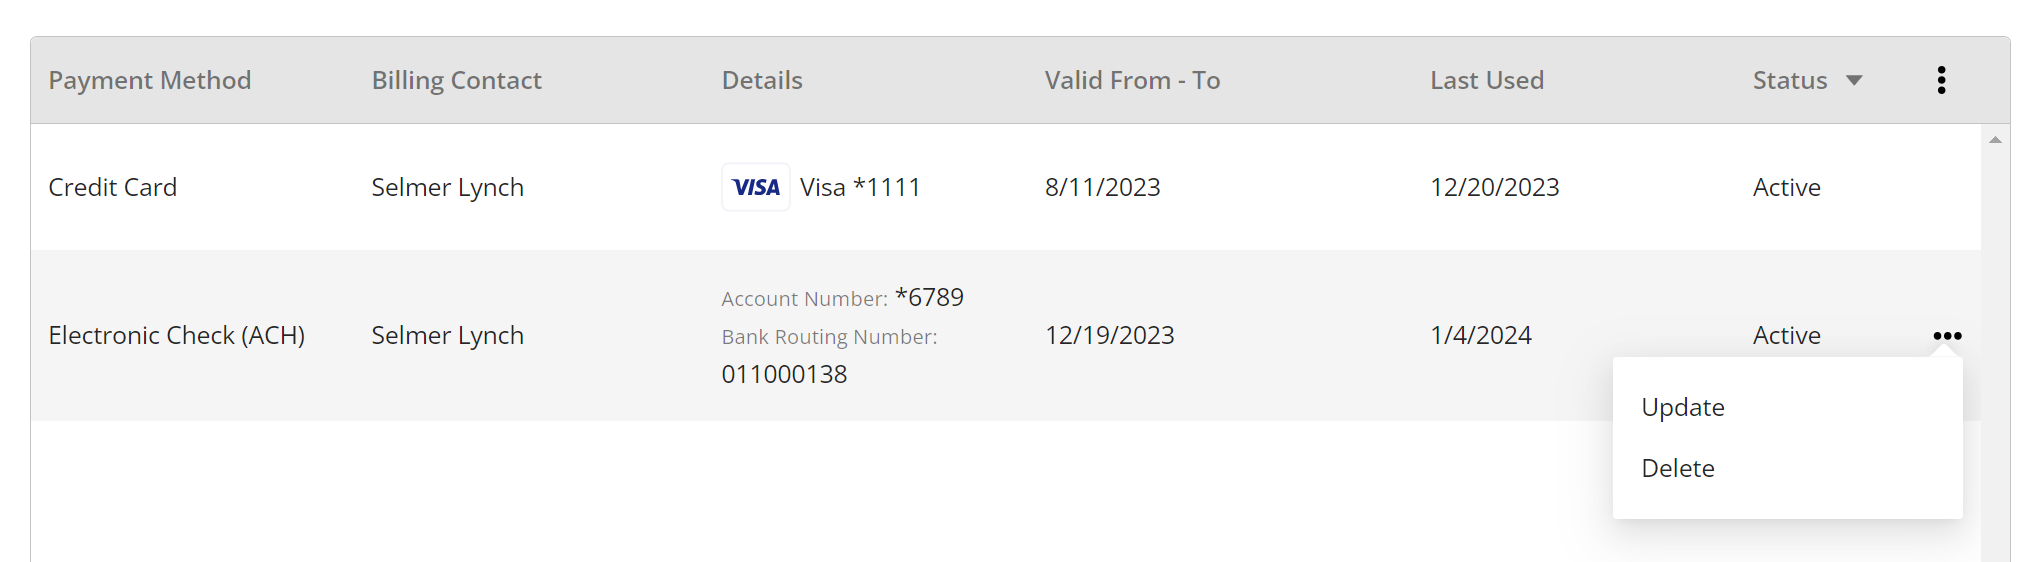
Edit Payment Methods
From the Payment Methods sub-tab you can update or delete any existing account Payment Method by selecting the row actions ⋯ next to that Payment Method.
To learn more about accounts, visit the Aria Billing Cloud Account Management page.