Create a New Quote for a New Account (Lightning)
After creating an account and a new quote without associated plans (and selecting a currency type), click the Manage Quote button to create/update a quote within an opportunity (select Active as the default at the New Account Billing Options dialog).
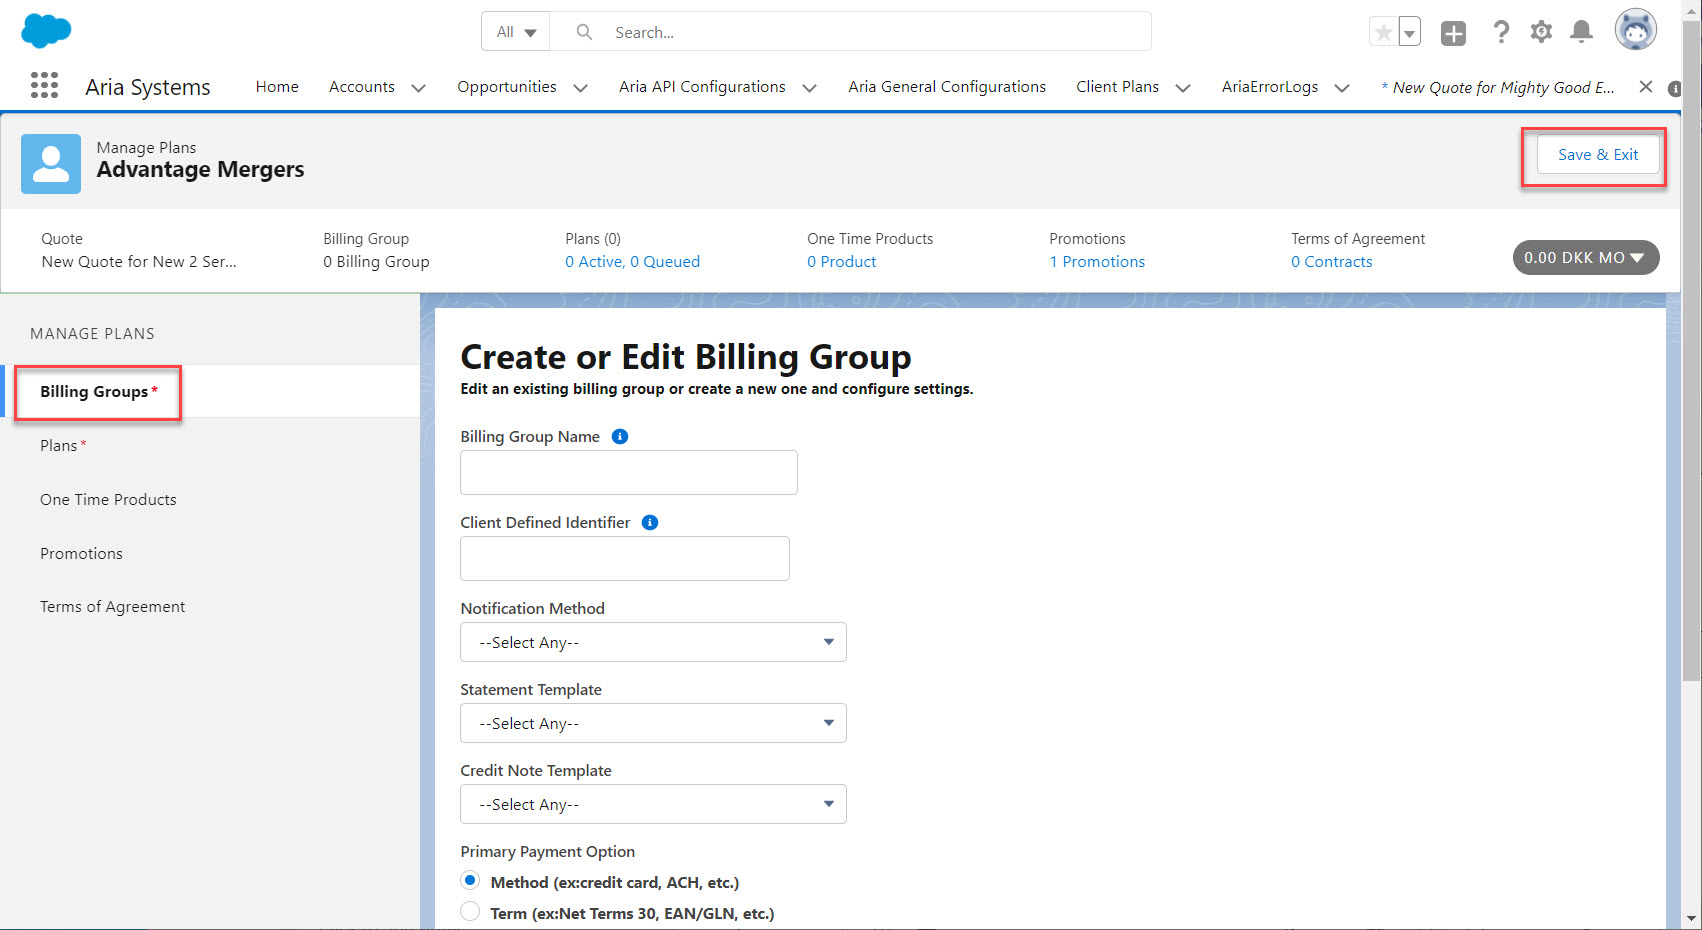
- · Create a billing group by selecting the Billing Groups left nav column selection (if a billing group has already been created, details automatically appear at this screen).
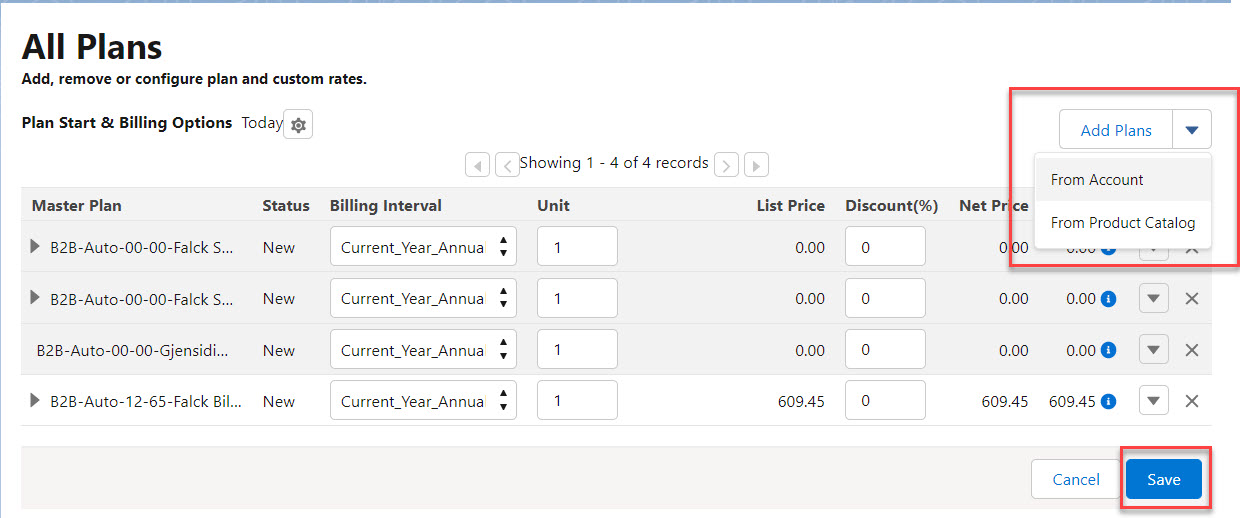
- · Select Plans from the left nav column (any plans already selected appear at this screen). Click the Add Plans button and select From Product Catalog from the drop-down list. Select one or more plans from the list by clicking the checkbox; enter the Unit and Discount% to update the Net Price and Total fields.
- · Select One Time Products from the left nav column (any products already selected for this quote appear at this screen).
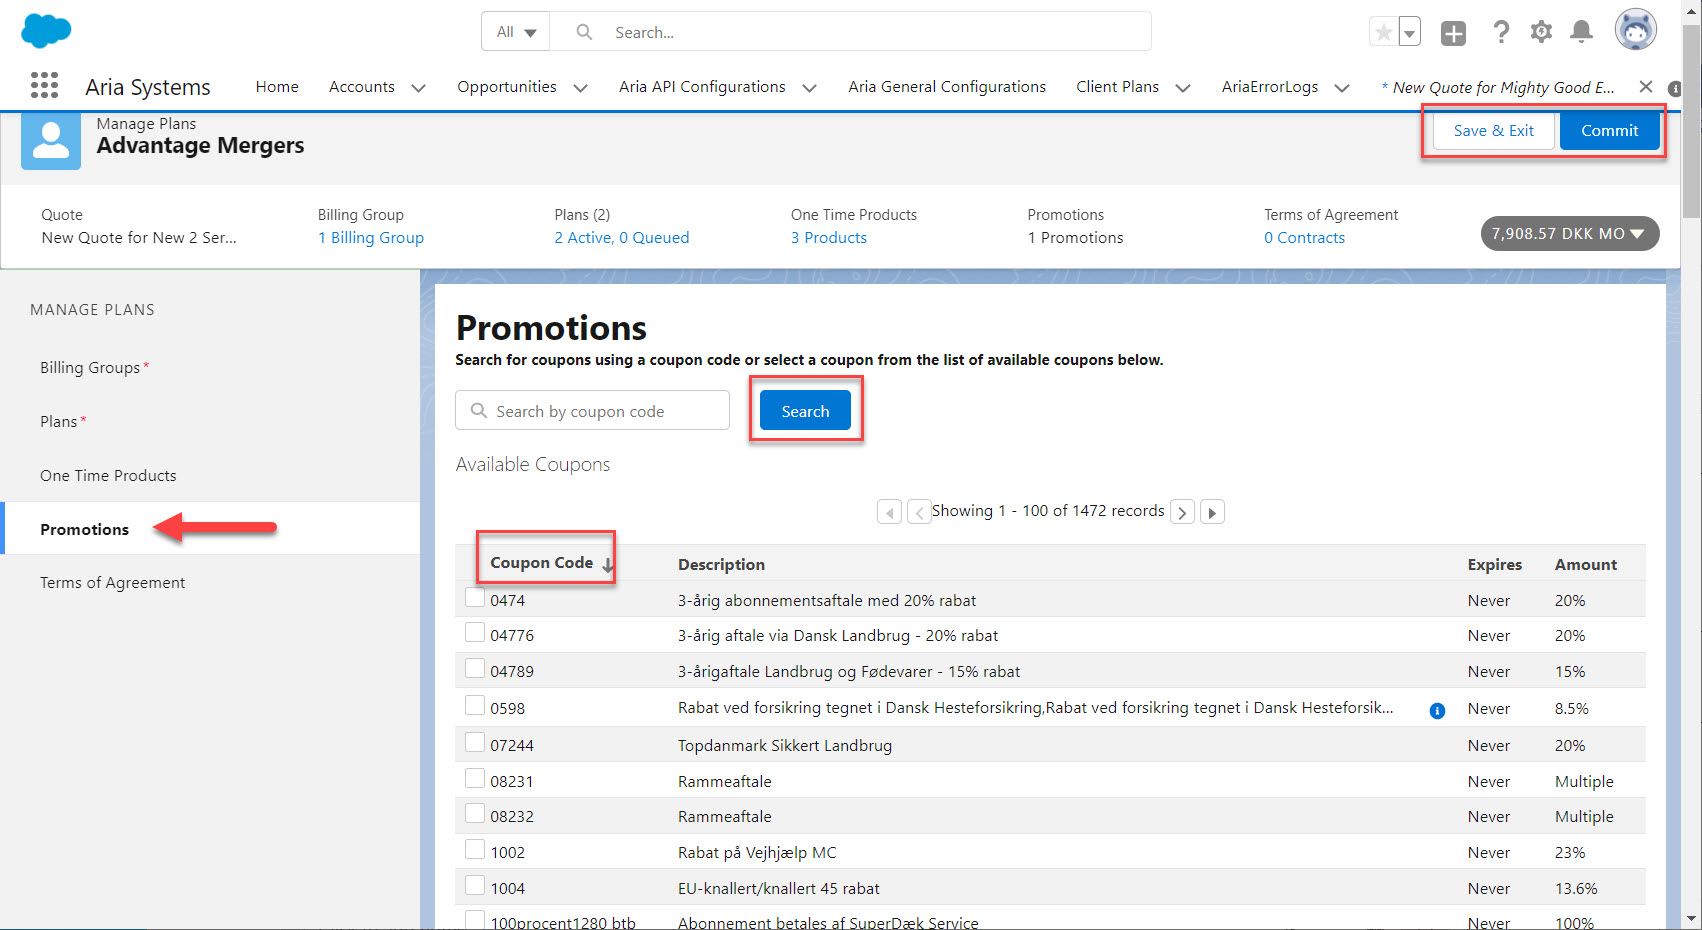
- · Select Promotions from the left nav column (any coupons already selected for this quote appear at this screen).
Press Save to retain the plan as part of the quote; Monthly Recurring Revenue (MRR), Total Contract Value (TCV), and Annual Recurring Revenue (ARR) are calculated properly after saving the quote. Press Save & Exit to return to the Opportunity screen and retain all quote details. Press Commit to commit all quote data for new and existing accounts.
(SFDC-1089, SFDC-1090, SFDC-1093, SFDC-1095, SFDC-1108, SFDC-1109, SFDC-1110, SFDC-1117, SFDC-1118)
After adding a plan to a quote (Actions label):
- Click the down arrow and select Duplicate; the plan is duplicated at the All Plans screen and added to the selected quote.
- Click the down arrow and select Configure; add plan attributes like subscription id, subscription description, subscription status, plan instance supplemental fields, and Billing Responsibility (details from the selected plan instance automatically appear at this dialog). At the Promotions/Validate Coupon Code field, enter the code and press Validate to save the validated coupon with the quote.
- Press X next to the drop-down arrow to remove the plan from the quote.
- Click Save to retain the values to the plan instance on the quote.
(SFDC-1087, SFDC-1088, SFDC-1091, SFDC-1092, SFDC-1146)
Manage a Quote Within An Opportunity (Lightning)
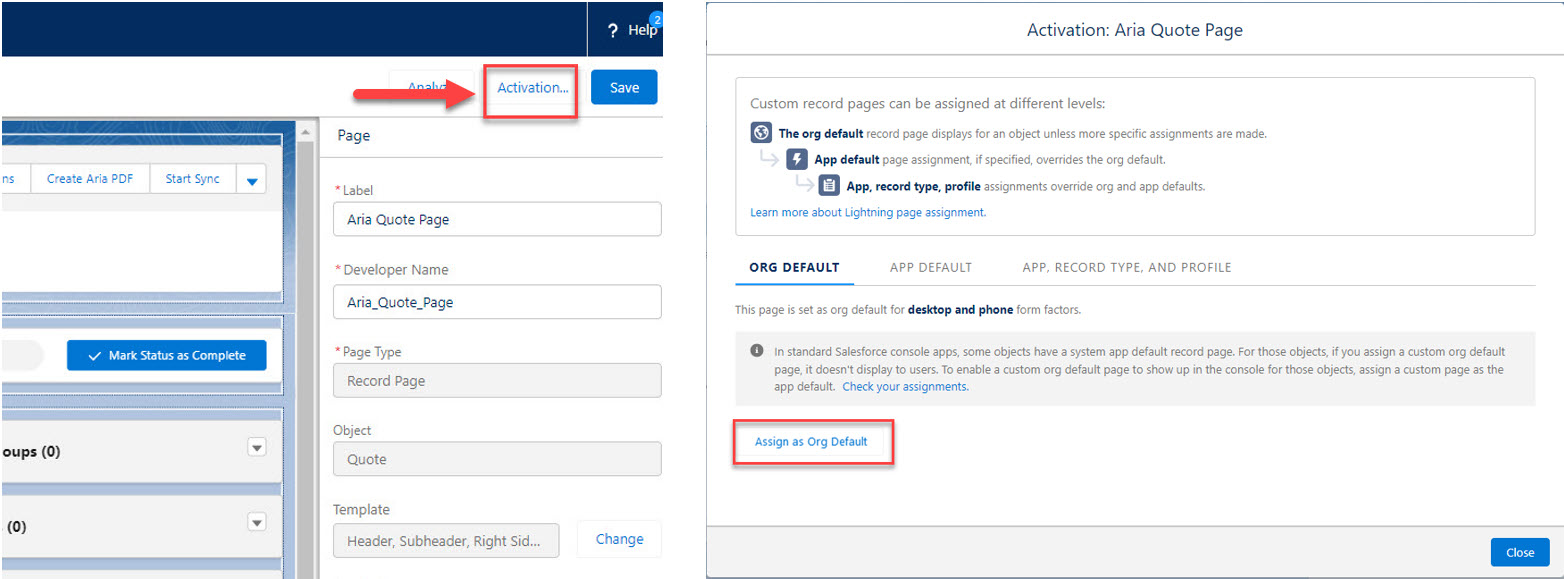
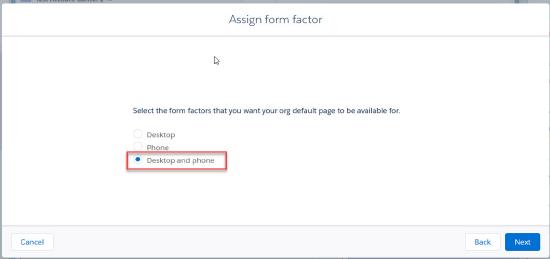
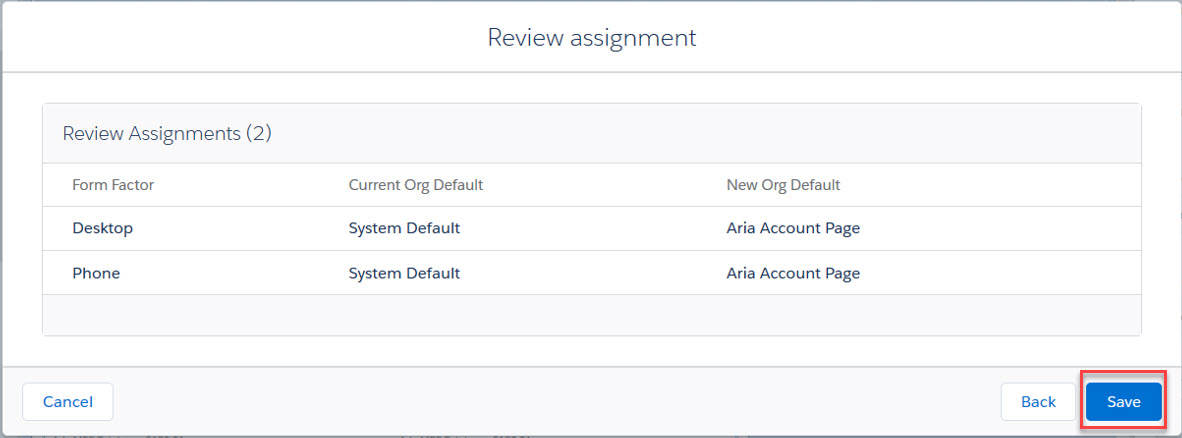
- An Aria Quote page in Salesforce Lightning has been arranged similarly to the Opportunities page, with Manage Plans featured on an action button row at top right to the left of the Create Aria PDF and Start Sync buttons, respectively. Manage Plans can be used to add or modify plans to the quote. This Quote page can be assigned as a user default with the top-level New Quote menu items. (SFDC-152, SFDC-1082, SFDC-1083, SFDC-1112, SFDC-1113)
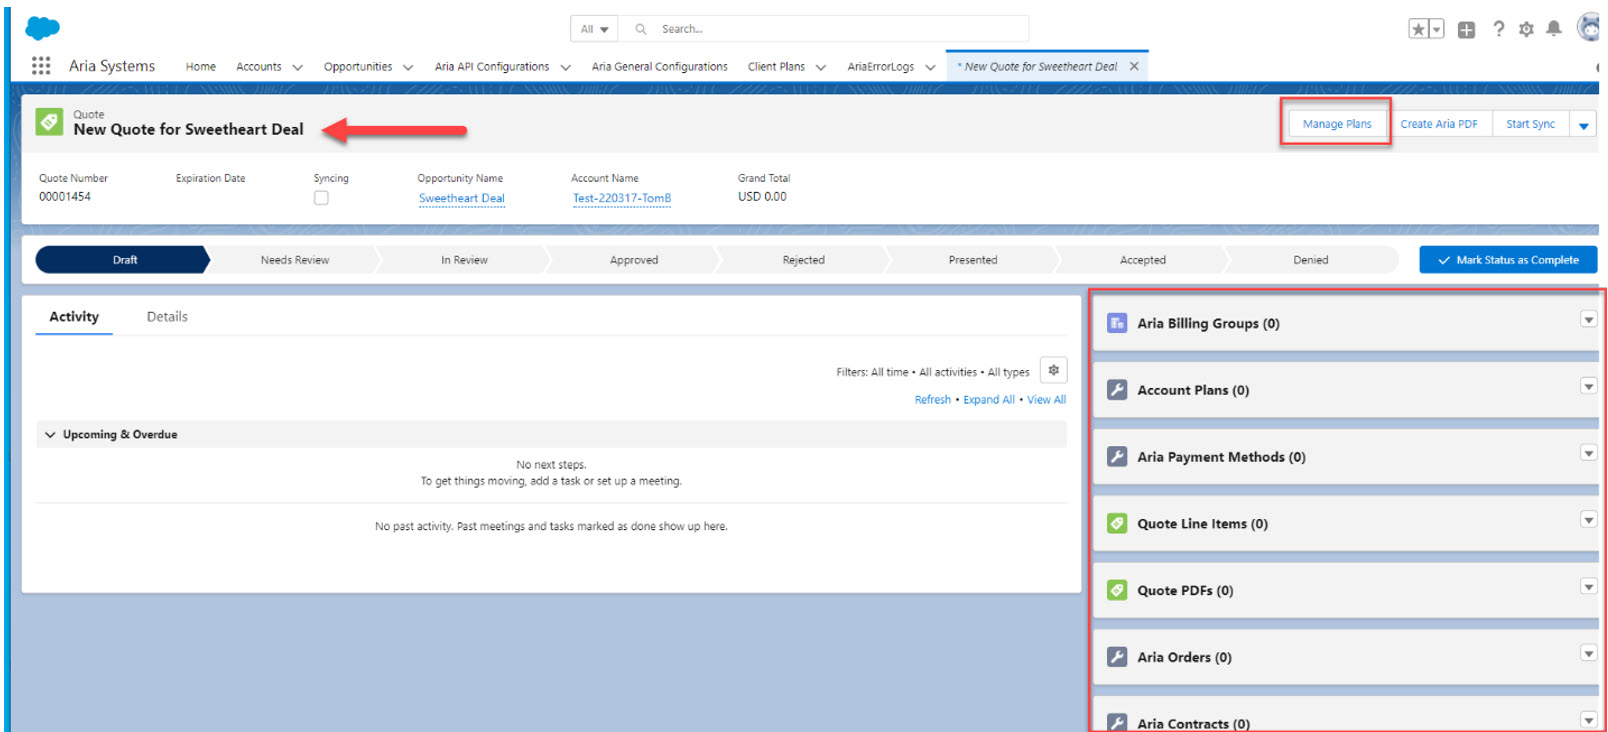
- In Lightning, the Manage Quote button has been added to initiate a task flow to create quotes for Opportunities (when clicking Manage Quote on a closed opportunity, a popup starts the process of creating an opportunity and quote when you specify plan instances and click the Next button). Click Manage Quote to start with a New Account Billing Options popup dialog and select "Active" (account status) and Save. If the “Disable New Account Billing Popup" check box is enabled under Account section in Add/Modify Plans option then "Account Billing Options" will not be displayed. Click Save in the New Account Billing Options screen and the quote will be created for the Opportunity. If the Disable New Account Billing Popup check box is enabled, the quote can be created. (SFDC-1084, SFDC-1115, SFDC-1116)
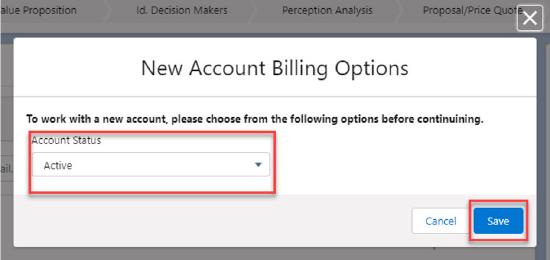
- In Lightning, it is now possible to save Billing Group information when managing quotes. Go to Accounts > [select existing account] > Opportunities [select existing opportunity]. At top right, click the Manage Quote button. With "Active" selected in the Account Status drop-down, click Save. In the Create and Edit Billing Group screen, make your field selections and click Save. A "Billing groups saved" message flashes up and the All Plans screen opens. You can Save & Exit or Commit the changes or proceed with quote. (SFDC-1085)
- For Salesforce Lightning, while managing a quote, it is now possible to add plans from the Product Catalog. Go to Accounts > [select existing account] > Opportunities [select existing opportunity] (on an open opportunity with associated plans and an existing quote, clicking Manage Plans on the Quote screen copies the objects from the opportunity and creates a new quote). At top right, click the Manage Quote button. When you get to the "Plans" step or All Plans screen, select the Add Plans button and choose from available plans in the Select Plans popup using the check boxes and click Add. After adding a plan to a quote, click the Done button to update/reference the plan instance associated with the quote with values selected/entered at the Set Options screen. (SFDC-1086, SFDC-1114)
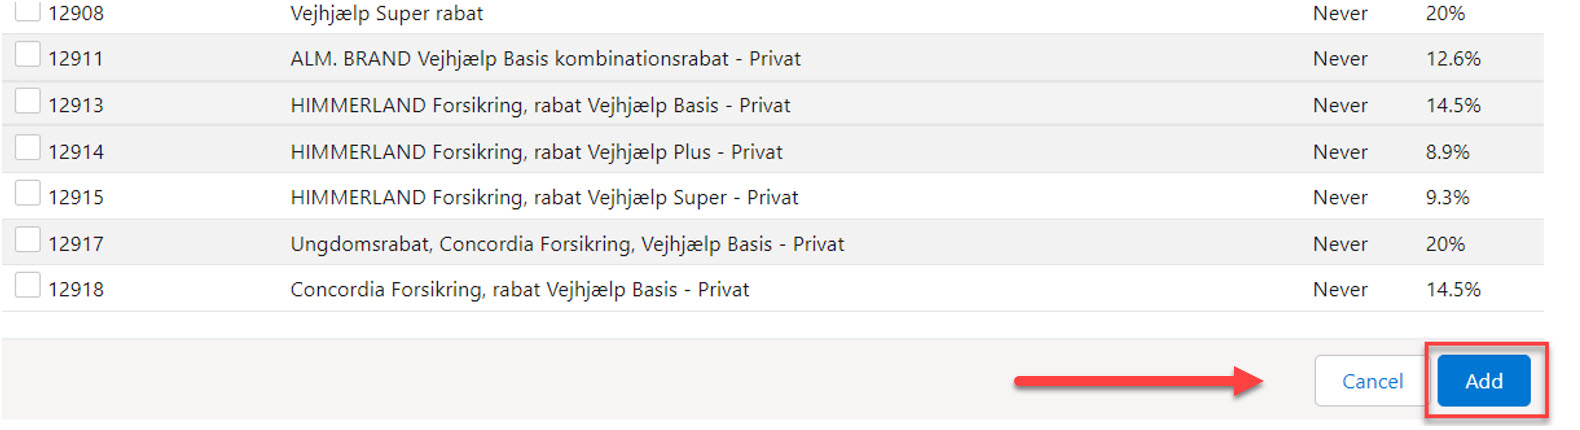
- While managing a quote in Lightning, in the "Promotions" step, when you click the Add Coupons button in the Promotions screen it opens a second Promotions screen. In the second Promotions screen, to select an item click the Coupon code check boxes or enter valid coupon code numbers in text field and click Search to find them. Click the Add button to complete the action. (SFDC-1097)
- In the Manage Quote task flow in Classic/Lightning, when adding coupons with the Add button via the Promotions screens the coupons will be validated and associated with the quote. In addition, the Add and Cancel buttons in the second Promotions screens work as expected in Lightning. In the second Promotions screen, click Add and to return to the first Promotions screen and the coupon is added to the listing. You can then Save the addition or Cancel out of the action. Save will save promotion changes and return to the All Terms of Agreement screen. If Add is unsuccessful in the second Promotions screen, a red warning box that tells you the coupon is invalid appears. In the second Promotions screen, click Cancel to close the screen and return to the previous Promotions screen. ((SFDC-1098, SFDC-1099)

- Contracts functionality for saving/updating to a quote, assigning plans and associated changes were added to Lightning.
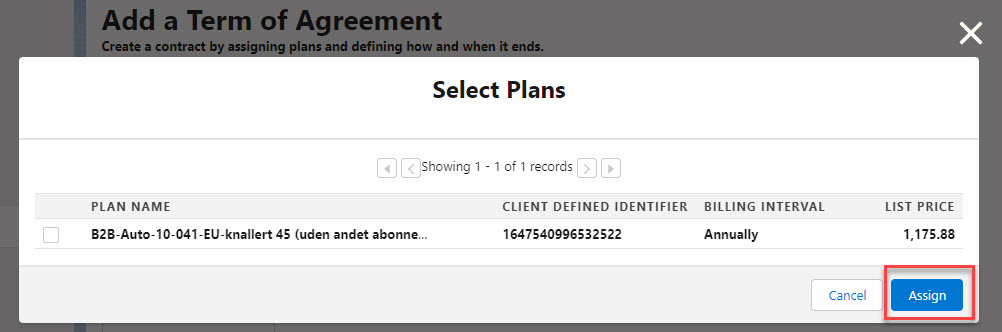
- To assign plans to a contract, in the Add a Term of Agreement or Edit a Term of Agreement screens, click the "assign plans" hyperlink in Plans at the bottom of the screen. In the Select Plans dialog, check a desired plan in the listing and click Assign.
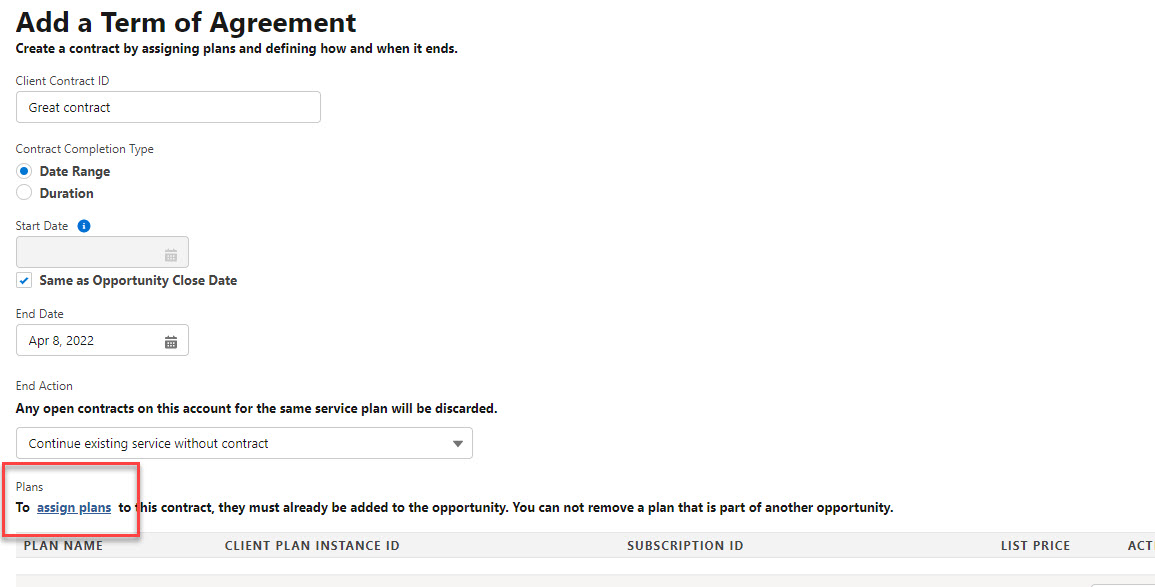
- In addition, the Save functionality works as expected in the Add a Term of Agreement or Edit a Term of Agreement screens, saving the contract itself or contract changes to the quote. Upon clicking Save, a green message box stating, "Terms of agreement saved" will appear.
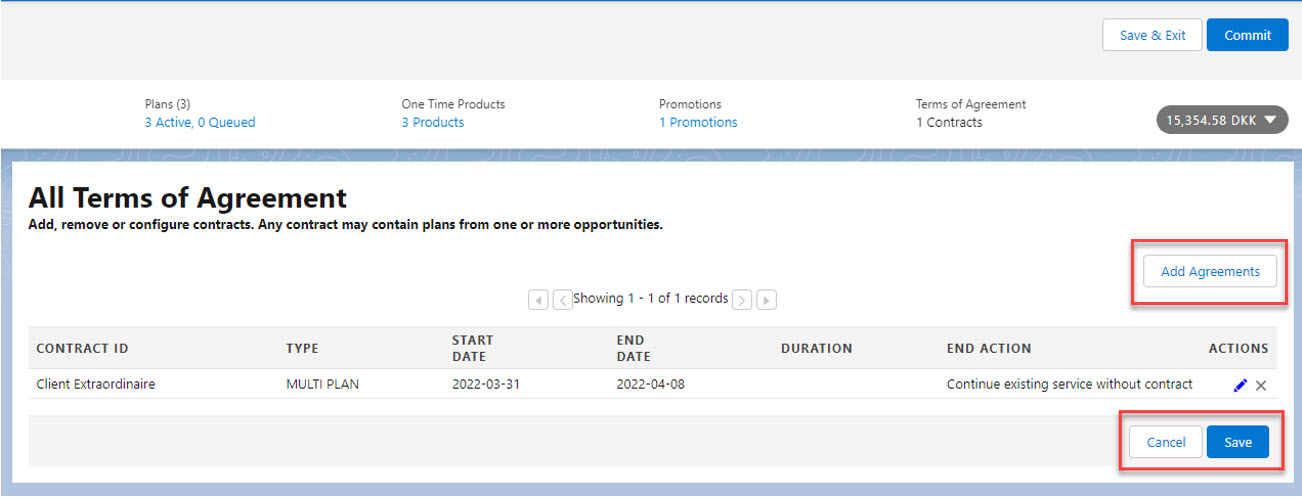
- Changes made in the Add a Term of Agreement screen will appear in the Contract IDs listed in the All Terms of Agreement screen and will be saved to the applicable quote.
(SFDC-1100, SFDC-1101, SFDC-1102 and SFDC-1103)
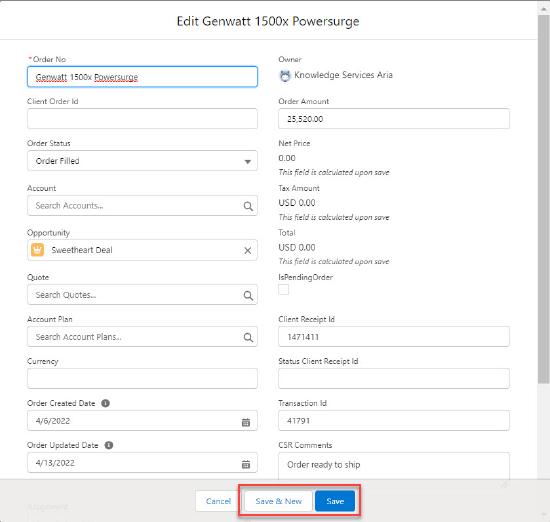
- In Lightning, when when one-time orders and plans are updated in either the Edit Order and Edit Plan windows, these changes are saved to the quote. To access the Edit Order Window, go to Accounts > [select an Account] > Aria Orders > [select an Order] > Edit button. For the Edit Plans window, see Accounts > [select an Account] > Account Plans > [select a Plan] > Edit button. (SFDC-1105)

Generate a PDF Quote Within an Opportunity (Lightning)
- On the Quote page in Salesforce Lightning, you can now generate a PDF of a quote based on field input using the Create Aria PDF button at top right to open the Aria Quote PDF dialog. The following functionality has been developed to support this new feature:
- To save the PDF quote, select Save to Quote button in the dialog. The resulting PDF will be listed in Quote PDFs on the Quote page. Use the Quote PDFs drop-down and select Email PDF to send the quote to the desired recipient. (SFDC-1508)
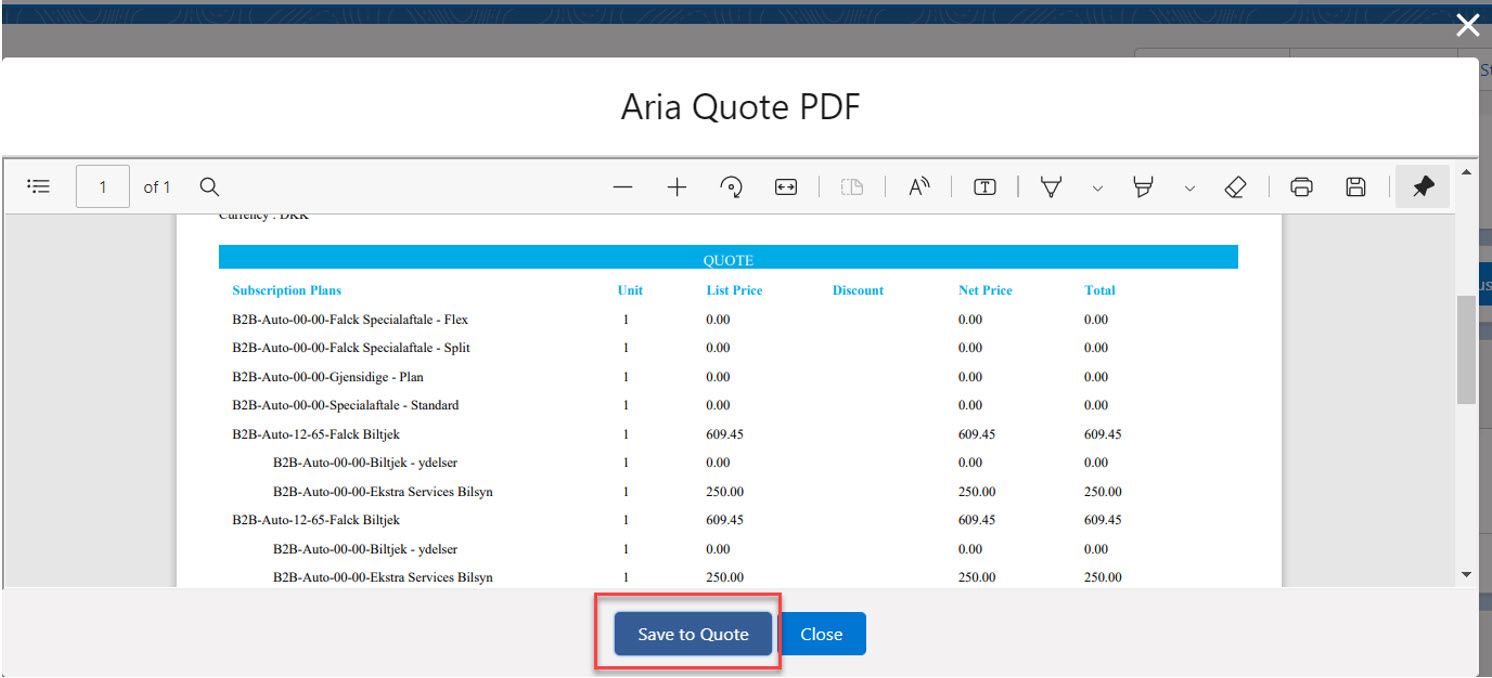
- On the Quote page in Lightning, the Aria Quote PDF displays values and attributes specified during Manage Quote process steps. For example, quote identifier, currency, subscription plans, products and pricing appear in the quote. Possible actions are using Save to Quote to copy the PDF to your quote so you can email it with the Email PDF action after creation. The Close button allows you to exit the Aria Quote PDF dialog.
- In Lightning, Aria Quote PDF structure and format has been implemented per template specifications with respect to Aria color and style pallet and logos. (please see the 6-step procedure to upload and replace the default Aria logo below):
- In Lightning’s Aria Quote PDF structure, the document will include a Promotion section that displays any discounted items or offers (with discount amount or percentage) along with a section Terms section that lists subscriptions and related contracts. Discount items are listed as separate line items with applicable coupon codes. If no discounts exist, this section is excluded from the quote.
- In Lightning’s Aria Quote PDF template text attributes and document design, styles were implemented for specific Aria font typeface, font size, color pallet, line spacing and header alignment.
- On the Quote page in Salesforce Lightning, click on the quote indicated by the "Created By" hyperlink. In the creator page under Files at right, click on the desired PDF quote to view it, download it to save it to a specific location or share it with Viewers/Collaborators within Salesforce. In the PDF Viewer window, a drop-down allows you to Edit File Details (e.g., currency), Delete or Upload New Version. In addition, a Public Link option allows you to create a link to share the file with large recipient groups.
To upload and replace the default Aria logo, follow these steps:
- In Classic, click on plus (+) button at end of menu row at top to go to All Tabs.
- Click on Documents.
- Select Aria Plan Documents in drop-down and click Go. (Note: The file named "CompanyLogoForAriaQuote" is designated for the logo used in the header and "FooterLogoForAriaPDF" is the name that designates the footer. When replacing a logo graphic, ensure your upload has identical name and format. Supported graphic file formats include JPG, PNG, and GIF.)
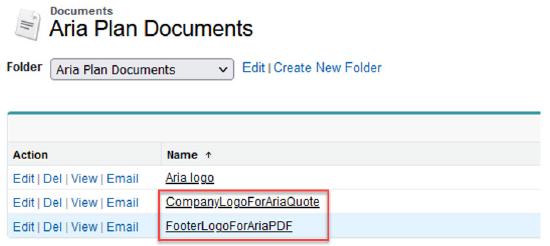
- To update the header logo, click on CompanyLogoForAriaQuote and click on Replace Document on the bottom of the page.
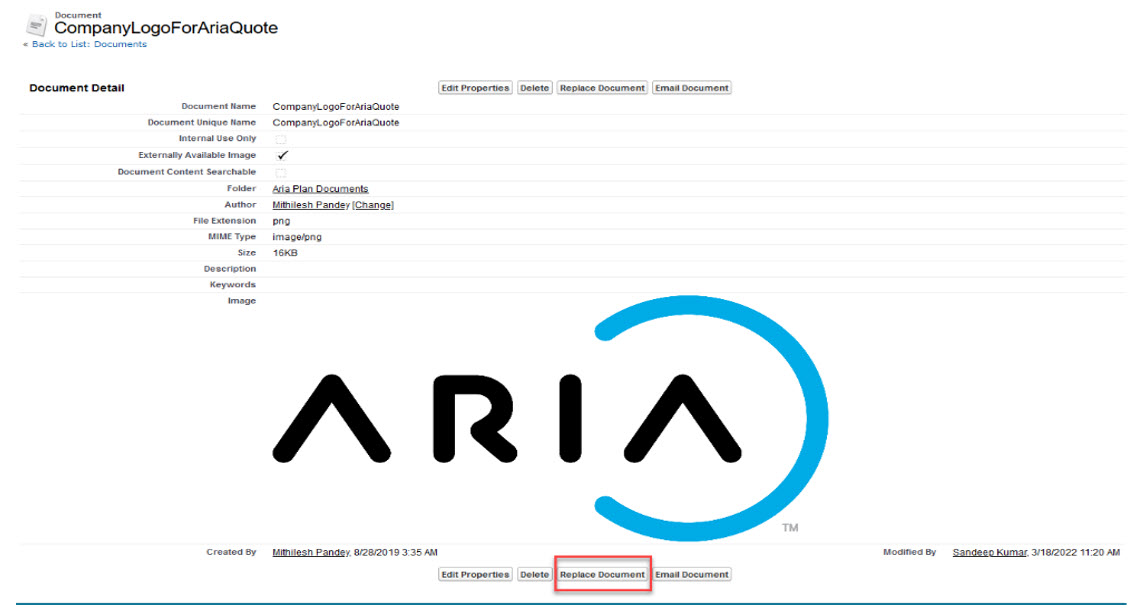
- In the Replace CompanyLogoForAriaQuote screen, use the "Enter the path of the file..." Browse button to upload and replace the graphic.
The "Create a reference link…" option allows you to reference a graphic location so changes can be made to the logo where it is stored without re-uploading and embedding the graphic inside the quote document.
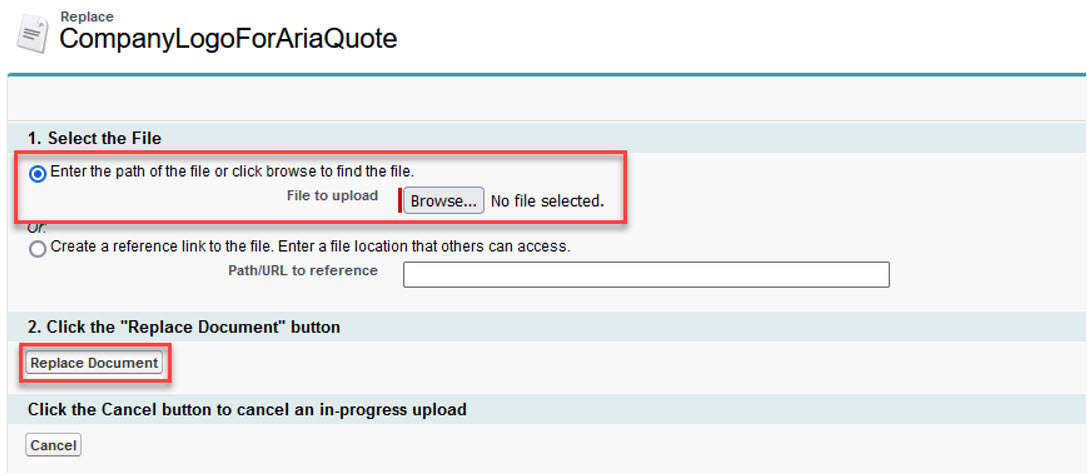
- To complete the upload/replace action, click Replace Document. Use Cancel to stop in-progress upload.
(SFDC-1508, SFDC-1509, SFDC-1510, SFDC-1511, SFDC-1756 and SFDC-153)
Sync Quote to Opportunity (Lightning)
At the Opportunity page, click the down arrow at the Submit for Approval button and select Start Sync. This syncs/copies Rollover Plans (on contract), the Alternate Bill Day if applicable (on plans), and the Alternate Plan Start Date (if applicable) from the quote to the opportunity. Status messages appear if there is nothing to sync and no quote line items or products. Additionally, clicking the Start Sync button means that all quote line items, and opportunity products will sync between Salesforce and the Aria core application. (SFDC-1147 and SFDC-1148)
Plan Exclusion Now Supported via Opportunity and Quote (Lightning)
- When pressing the Add Plans button and selecting the From Product Catalog drop-down list, if trying to subscribe to more than 1 supplemental plan marked for exclusion and all supplemental plans belong to the same Plan Exclusion group, the second supplemental plan checkbox is not selected and the following message appears: “You cannot purchase < 2nd SPI name>. Please change your selection.” (SFDC-1327)
- From the All Plans screen, if trying to subscribe to more than 1 supplemental plan marked for exclusion (indicated by a strikethrough mark) and all supplemental plans belong to the same plan exclusion group, the second supplemental plan checkbox is not selected and the following message appears: “You cannot purchase < 2nd SPI name>. Please change your selection.” (SFDC-1412)
Manage a Quote Within An Opportunity (Classic)
For Salesforce Classic, saving changes in the Opportunity Overview screen using Save & Exit button will save changes to the quote. Clicking Save & Exit closes to the Quote screen. (SFDC-1104)
Assigning Master Plans to Accounts (Classic & Lightning)
In Salesforce Classic and in Lightning, when assigning a new MPI with mandatory SPI(s), it is now possible to edit the units of the mandatory SPI(s) at the time of assigning the new MPI to the existing account. (SFDC-163 ER-1930 and SFDC-14 ER-1930)
Irrelevant Warning Messages Removed From Opportunity Management Screens in Debug Mode (Lightning)
When running Aria For Salesforce in Debug Mode, warning messages will no longer appear on the following screens displayed when management an Opportunity:
- Manage Plans screens:
Clicking the "Manage Plans" button no longer results in messages displaying; for new Accounts, Billing Options popup as expected; and for existing Accounts, the "Select Plans" popup no longer shows warning messages.
- Billing Group screens:
Warning messages are no longer displayed among the expected data when landing on or clicking into the "Billing Group" screen.
- All Plans screens:
When landing on or clicking into the All Plans > Configure screen, warning messages are no longer shown. Warning messages will also no longer be shown on the <From Account> field and the <From Product Catalog> field; when you check or uncheck the "Supplemental Plan Instance (SPI)" checkbox; on the input fields <Billing Interval>, <Unit>, or <Discount>; on the input fields and buttons on the "Configure" screen; and on the buttons on the "All Plans" screen.
- Plans screens:
Warning messages will no longer appear on input fields and buttons on the "Edit Rates" and "Swap Plans" screens. Neither will there be warning messages on the "Cancel Plans" message popup; "Duplicate Action"; and the input fields and button on the "Set Options" screen.
- One Time Products screens:
Warning messages no longer appear when landing on or clicking into the "One Time Products" screen; when landing on the "Selected One Time Products" screen; and on input fields and buttons on the "Add One Time Products" and "Selected One Time Products" screens.
- Promotions screens:
Warning messages no longer appear when landing on or clicking into the "Promotions" and "Promotions Catalog List" screens; when landing on the "Existing Promotions" screens; and on input fields and buttons on the "Promotions Catalog List" and "Promotions" screens.
- Terms of Agreement screens:
Warning messages no longer appear when landing on or clicking into the "Terms of Agreement", "Add a Term Agreement Catalog List", and "All Terms of Agreement" screens; and on input fields and buttons on the "Add a Term of Agreement" and "All Terms of Agreement" screens.
- Overview screen:
Warning messages no longer appear when clicking on headers on the "Overview" screen; when clicking on the "Save & Exit" and "Commit" buttons; and on input fields and buttons on the "Provide Payment Information" popup screens for both Primary and Secondary Payment Methods.
(SFDC-1717, SFDC-1733, SFDC-1734, SFDC-1735, SFDC-1736, SFDC-1737, SFDC-1738, SFDC-1738)
Maintain Billing Dates for Reactivating Cancelled/Terminated Plans
Changing the status of a cancelled/terminated plan from the Account Plan section (on the Terminated tab and when editing a billing group) now does not change billing anniversary dates. (SFDC-438)
Aria for Salesforce Fixes