Aria Knowledge Central

Create an Email Template

Overview

Email templates are used by Aria to send email messages to your customers. You can use Aria's pre-built email templates or create your own customized email templates for sending email messages. Email templates are grouped into classes based on their function.

For example, you can have Aria send email messages to your customers to notify them that their contract is about to expire, their credit card on file is about to expire, or their account is past due.

Note: You can designate contact information for several different types of contacts for an account. Aria sends email messages to either a default contact, or a contact you designate, depending on the nature of the message.

Creating an Email Template

Getting Here: Click Configuration > Notifications > Email Templates

  1. Click New.
    create new email templatev2.png
  2. From the Template Class drop-down, select the predefined email template to use for the email message.
  3. From the Content Type drop-down, select the format to use for the email message (text/html or text/plain).

    Note: The default value of text/html provides a WYSIWYG for easy template formatting. Switching to the text/plain value allows for the use of HTML for more advanced formatting. Images must reside on a publicly accessible server, then provided within image tags.

  1. From the Locale drop-down, select the System_US_English_locale default, or a locale set up from the Create Locale Settings page.
  2. In the Name field, enter an explanation of the purpose of the email message. This will not be displayed to the recipient.
  3. In the Subject field, enter the subject to display in the email message.
  4. In the From Address field, enter the from address to display in the email message.
  5. In the Reply To Address field, enter the reply to address to display in the email message.
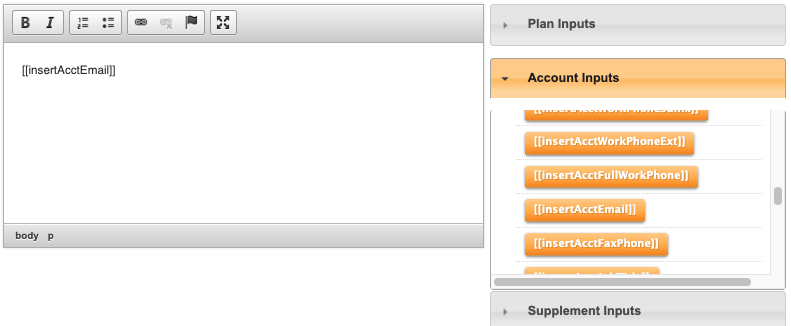
  6. Click any group of inputs under on the right side of the screen to choose information to include in the email message.
    email_template_new_2v2.jpg
  7. Select your chosen input.
  8. The input that you added displays in the message body.
    email_template_new_3v2.jpg
  9. Repeat the previous step for any additional inputs that you want to include in the email message.
  10. In the message body, enter any additional text to include in the email message.
  11. Click Save.
  12. Repeat the previous steps to create additional customized templates.

To specify that Aria should use the template that you created to send the email message that you selected, complete the steps listed below.

Specifying that a Template Should be Used

Getting Here: Click Configuration > Notifications > Email Templates

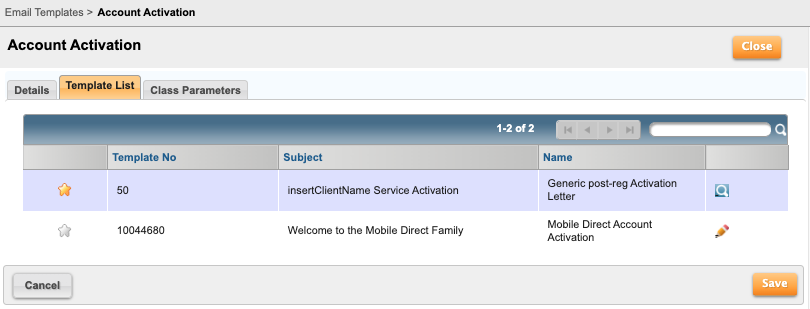
  1. Click the Class Name of the email message for which you just created a customized template.
  2. Click the Template List tab.
    email_template_new_4v2.jpg
  3. Click the star icon next to the customized email template that you want to use to send email notifications to customers.

    Each customized email template that has the pencil icon next to it and can be edited.

  1. Click the pencil icon to edit the email template.
  2. Click Save.

Aria will use your selected email template to send email messages to the applicable customers.

  • Was this article helpful?