
This article provides the steps necessary to create a Notification Template Group.
Create a Notification Template Group
Overview
Getting Here: Click Configuration > Notifications > Notification Template Group

- Click New on the Notification Template Groups screen. The New Notification Template Group screen displays. This screen contains fields that allow you to name and define the template group.

Note: Fields with an asterisk are required for completion.
- Enter a unique ID in the Client Group ID field. The ID—which can be up to 50 characters in length—is a unique name that is assigned to the template group. The field does not allow spacing between characters. If you do not enter a Client Group ID, Aria will automatically enter a system-generated one for you.
- If you wish to assign this as the default Notification Template Group for this client, check the box next to "Make this the default template group?" When this box is checked, all accounts will default to this notification group if no other groups are mapped to the account. This also applies to dunning plan assignments.
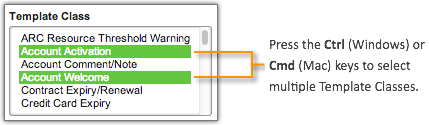
- Select the appropriate template class from the Template Class list. It is possible to add multiple template classes to a template group by pressing and holding the Ctrl (Windows) or Cmd (Mac) keys while making your selection from the Template Class list.
Note: A Notification Template Group must contain at least one template class.
- Upon selecting the desired "Template Class," click Add. The selected "Template Class" loads at the bottom of the screen allowing you to:
- Choose the email template to use for the notification.
- Define the behavior of the Template Class.

- Select the desired email template from the Template dropdown. This template is the template that is used when communicating with an account holder. For instance, if you wish to send an "Account Welcome" email to an account, select the desired Welcome email template from this dropdown.
- Select the desired template behavior from the Behavioral Option Override dropdown. The Behavioral Option Override will override the behavior defined by the notification method for this client. The available Template behaviors include:
- None – Indicates that the behavior as defined in the email template class will not be altered.
- Distill and Send Message – The Notification Template message is generated and sent to the designated account holder.
- Distill Message But Do Not Send – The Notification Template message is generated but is not sent to the designated account holder.
- Produce No Message – The system does not generate a Notification Template message.
- Upon selecting the template behavior, click Save. The Notification Template Group is created and appears on the Notification Template Group list screen.