
Overview
An Account Template contains predefined fields that are available to your users during the account creation process. Custom account templates can streamline the account creation process by providing only the necessary fields and actions necessary for your users to create an account.
Creating an Account Template
Getting Here: Click Configuration > Client Settings > Account Creation
- Click New.

The Create New Account Template screen displays. - Enter a descriptive name for the template in the Template Name field.
Note: Fields marked with a red asterisk are required.
- Select the roles to which this template should apply from the Configure Roles for This Template box.
- Select the configuration options to be available to users as they are creating an account. The available configuration options include:
- Country Configuration: Selecting Yes for this option allows you to define the available countries that the user can assign to the account.
- Currency Configuration: Selecting Yes for this option allows you to define the available currencies that the user can assign to the account.
- Account Coupon Configuration: Selecting Yes for this option allows you to choose account-specific coupons that the user can apply to the account.
- Master Plan Coupon Configuration: Selecting Yes for this option allows you to choose master-plan-specific coupons that the user can apply to the account.
- Account Status Configuration: Selecting Yes for this option allows you to choose account statuses that the user can assign to the account.
- Notify Methods Configure: Selecting Yes for this option allows you to configure the notification methods that the user can assign to the account.
- Payment Methods Configuration: Selecting Yes for this option allows you to configure the payment options that the user can assign to the account.
- Security Questions Configuration: Selecting Yes for this option allows you add one or multiple security questions that the user can assign to the account.
- Functional Group Configuration: Selecting Yes for this option allows you to add functional account groups that the user can assign to the account.
- Configure Collection Account Groups: Selecting Yes for this option allows you to add collection account groups that the can assign to the account.
- Within the Account Details, Account Contact, Account Fields, and Plans sections of the screen, select the Configure button to customize each applicable account field.
By configuring these fields, you are customizing how they appear to users. Refer to the below screenshot and corresponding descriptions for an example of how to configure the Account Status field.
Note: Fields marked with a red asterisk are required.

- Field Label: The name of the field as it appears on the Create New Account screen.
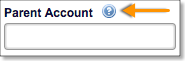
- Help Text: Informational text that provides the user with context. If text is entered in the Help Text field, a tooltip icon displays next to the corresponding account field on the Create New Account screen. Hovering over this icon displays the help text.
- Default Value: This sets the default value for the account's status when the account is first created. Choose one of the following from the drop-down: Active, Registered Pending Activation, or Permanent. This option is only offered for certain fields.
- Display: Determines whether the account field displays in the account template. The available options are Yes and No.
- Required: Determines whether the account field is required for completion on the Create New Account screen. The available options are Yes and No.
- Editable: Determines whether the account field can be edited by the user on the Create New Account screen. The available options are Yes and No