
Pre-Installation Tasks
Overview
To successfully install Aria For Salesforce, you must first configure a few components on both Salesforce.com and your Aria instance. On Salesforce.com, you must configure Quotes and User Profiles. In your Aria instance, you must configure a Promotion Code, and whitelist the Salesforce.com IP addresses. You must also configure event notifications through OAuth in both Salesforce and Aria to support the syncing of account data between Salesforce and Aria.
Enabling Quotes
If you want to use Quotes to support your sales process within Aria for Salesforce, you must enable the Quotes feature in Salesforce.
Note: Quotes may already be enabled in your Salesforce.com instance. If they are, you will notice a Quotes tab in the top menu in the Sales component of Salesforce.com.
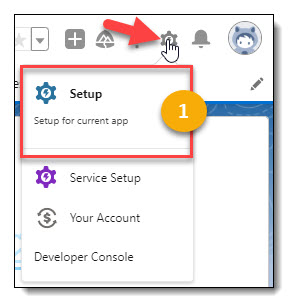
- Click the Setup icon, then click Setup from the dropdown.
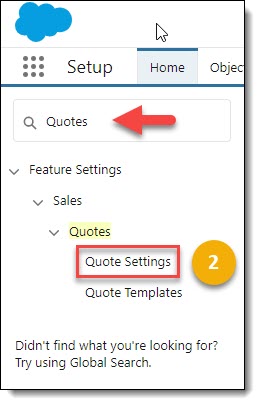
- Enter “Quotes” in the Quick Find box, then select Quote Settings from the dropdown.
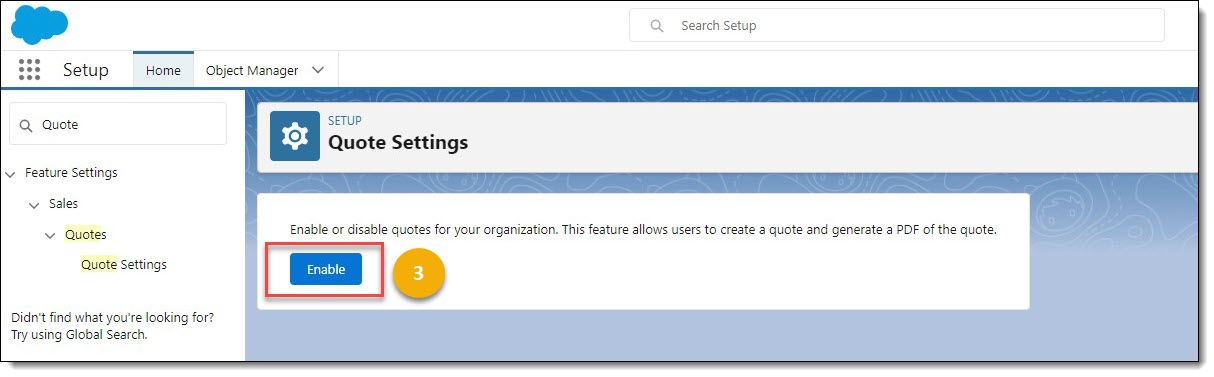
- Click the Enable button.

You have enabled Quotes in your Salesforce application, and the Quotes tab appears on the Salesforce Sales Home main menu.
Set Up Salesforce User Profiles for Use with Aria For Salesforce
During installation, AFS requires that you associate two Salesforce.com user profiles with two Aria For Salesforce user profiles included in the package: Aria Standard User, and Aria Admin User. The AFS user profiles have the following permissions:
- Aria Standard User—This profile has access to view, create, edit, and delete accounts, contacts, contracts, documents, opportunities, and quotes.
- Aria Admin User—This profile has access to view, create, edit, and delete accounts, contacts, contracts, documents, opportunities, quotes, account plans, account rate tiers, Aria API configuration, Aria supplemental field mappings, client plan relationships, services, and rate schedules.
To accommodate this requirement, Aria suggests you create two new user profiles in Salesforce.com. These provide you access to the two Aria for Salesforce user profiles after installation.
Note: If you do not create the two user profiles or map existing profiles to the two Aria profiles during installation, you cannot access the Aria profiles after installation.
To create Salesforce.com user profiles for Aria For Salesforce:
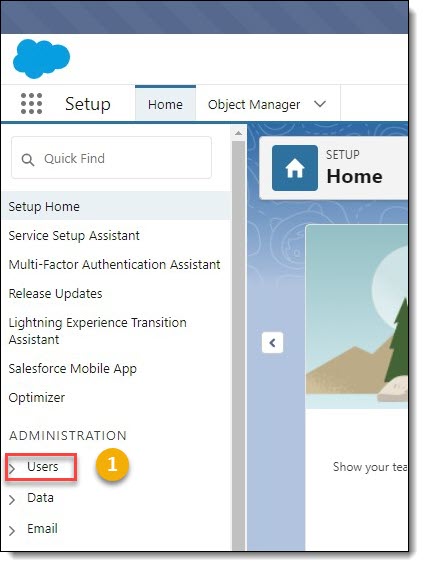
- From the Setup main menu, click Users.
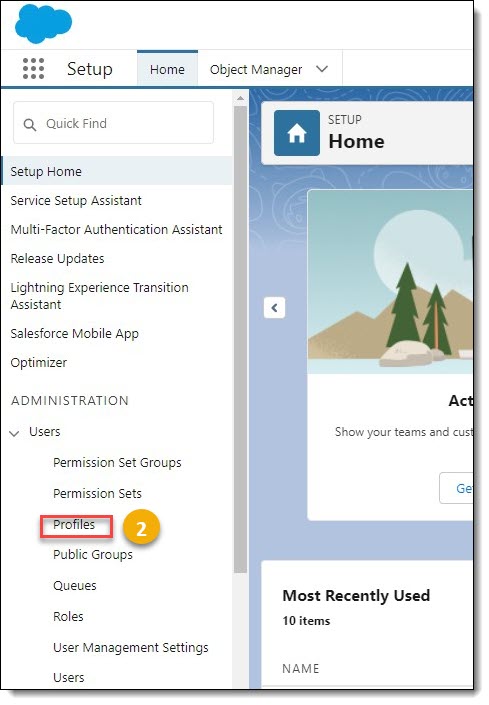
- Click Profiles.

- Click Clone on the Salesforce Standard User.
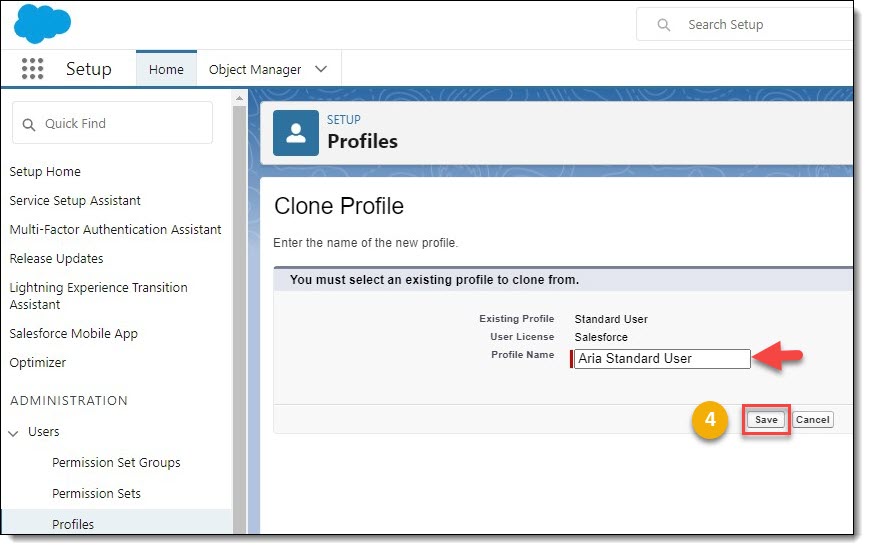
- Enter the new Profile Name. In this example, we are cloning the Salesforce.com Standard User profile and naming it "Aria Standard User." Click the Save button.
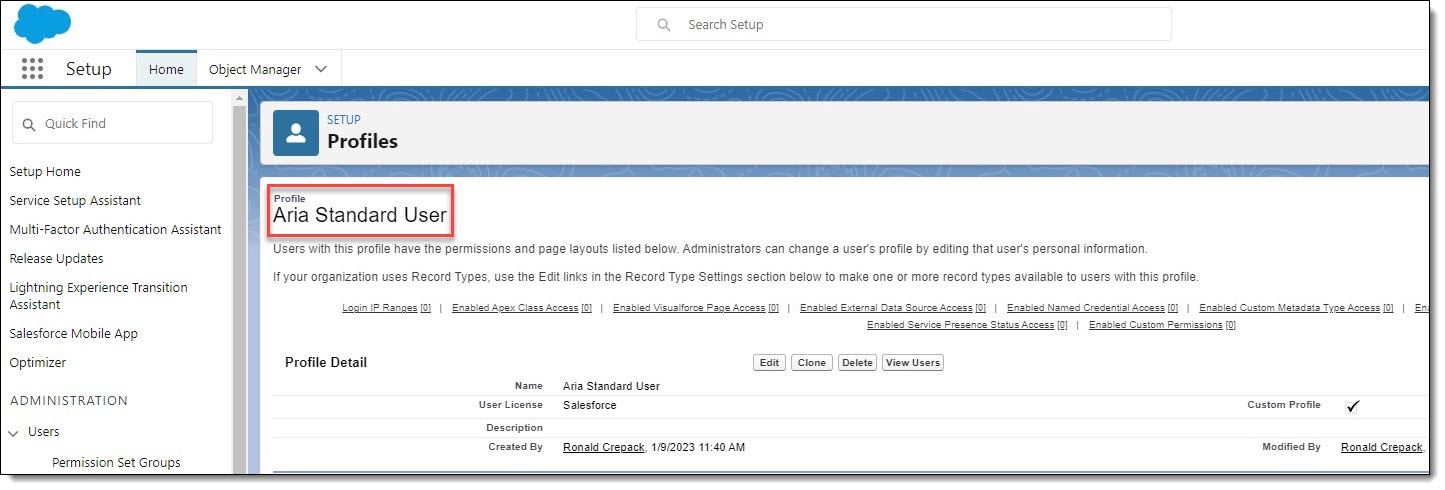
You have created the Aria Standard User profile is with the same Page Layouts, Field Level Security, Custom App Settings, Connected App Access, Tab, Record Type, Administrative, General User, and Standard Object permissions and settings as the Salesforce Standard User. You can modify these as required to support your business processes.
Repeat steps 1 through 4 in this section to create the Aria Admin User profile by cloning the Salesforce System Administrator profile.
Create a Promotion Code
You must create a Promotion Code in Aria that will be used by AFS to retrieve Aria Plans you want to offer your customers within your Salesforce.com application. You can create a Promotion Code that includes all Plans in your Aria instance, or a subset of those Plans. Aria requires a Promotional Plan Set to associate a Promotion Code to.
Create a Promotional Plan Set
Getting Here: Marketing > Promotional Plan Sets
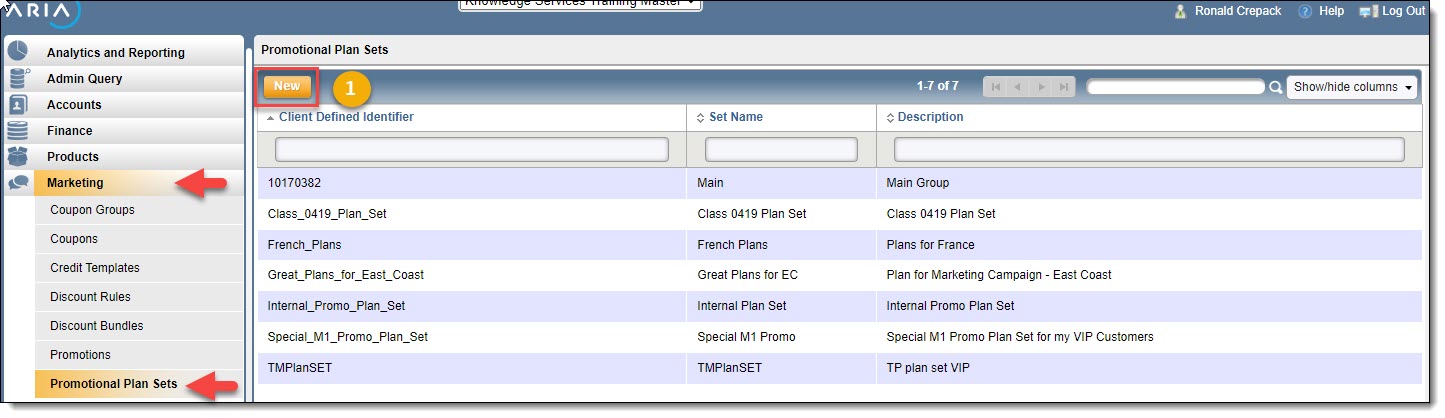
- Click the New button.
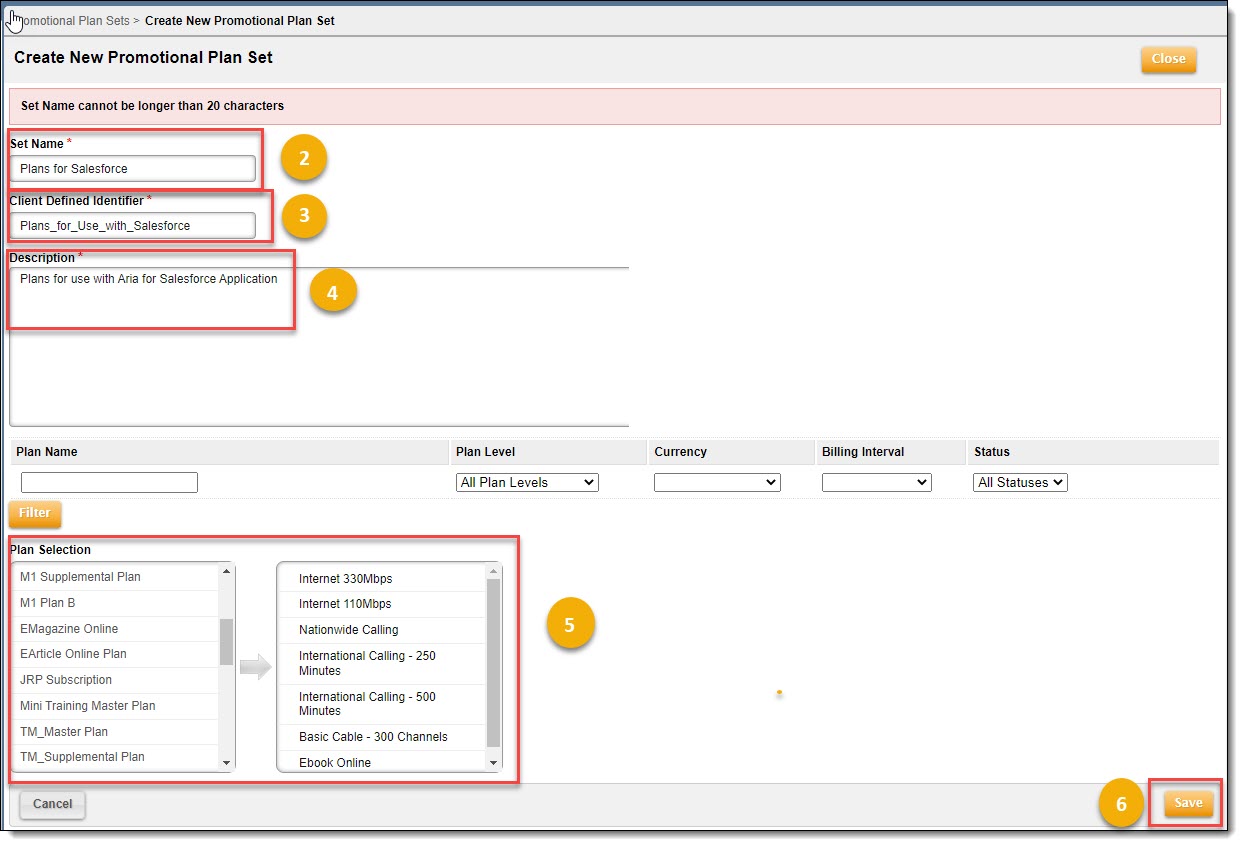
- Type in a Set Name for the new Promotional Plan Set.
- Type in a Client Defined Identifier to uniquely identify the new set.
Note: Aria automatically creates a new client-defined identifier that you can change if desired.
- Type in a Description.
- Click to select Plans to include in the new Promotional Plan Set. Plans selected will display in the box to the right. click Plans selected to deselect.
Note: You can filter Plans for selection by Plan Name, Plan Level, Currency, Billing Interval and/or Status.
- click the Save button to save the new Promotional Plan Set.
Create a Promotion Code
Getting Here: Marketing > Promotions
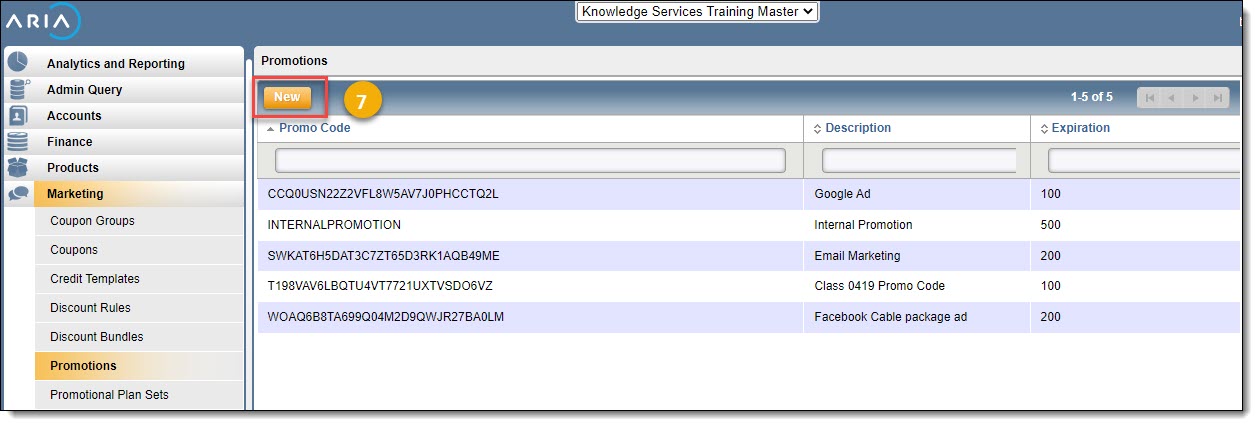
- Click the New button.
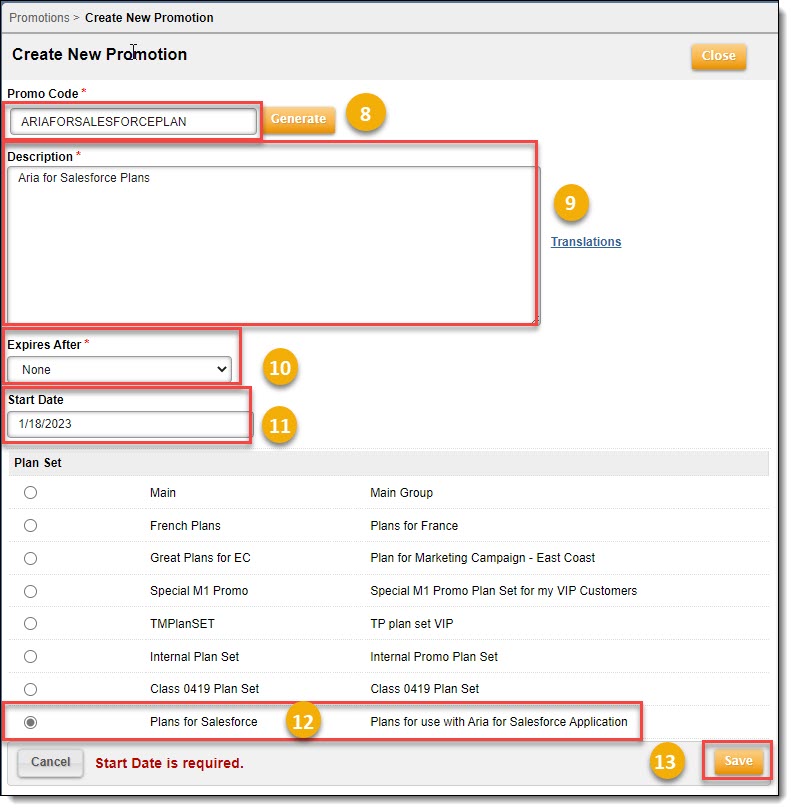
- Type in a Promo Code.
Note: You can also click the Generate button, causing Aria to generate a Promo Code.
- Type in a Description.
- Select None from the Expires After drop down.
- Select or type a Start Date for when this Promotion Code will be available.
- Click the radio button of the desired Promotional Plan Set to include in this Promotion Code.
- Click the Save button.
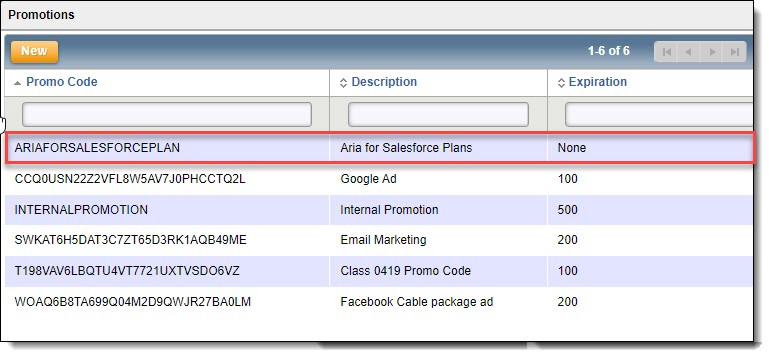
You will use this new Promotion Code to configure the Aria for Salesforce application to retrieve the Aria Plans you want to make available on Salesforce.com.
Whitelisting the Salesforce.com IP Addresses
Prior to installing the Aria for Salesforce application, you must whitelist the IP addresses from which Salesforce will be making API calls to Aria. The Salesforce.com IP address ranges can be found at Salesforce IP Addresses and Domains to Allow.
Notes:
- If you do not whitelist these IP addresses in Aria, you will encounter authentication errors.
- Salesforce does not offer static IP addresses or small ranges of IP addresses for individual instances. All IP ranges are provided in Classless Inter-Domain Routing (CIDR) notation. For more information on CIDR please see Classless Inter Domain Routing on Wikipedia.
- Salesforce.com recommends you allow the entire list of Salesforce.com IP ranges for seamless access.
Getting Here: Configuration > Integrations > Web Service API
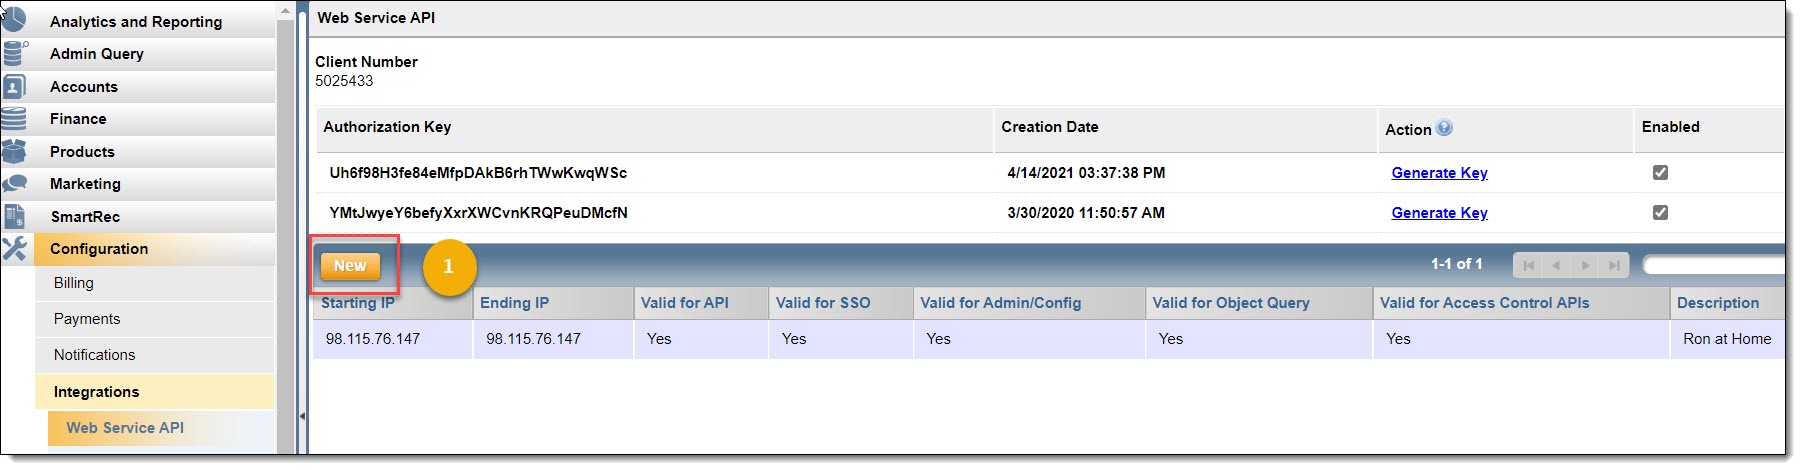
- Click the New button.
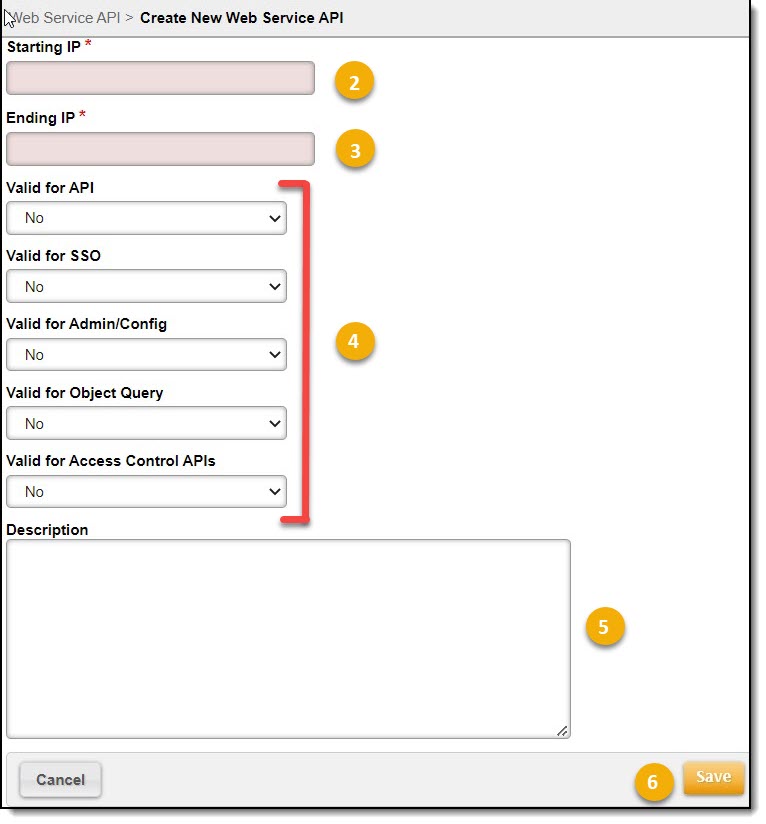
- Type in the Starting IP address.
- Type in the Ending IP address.
- Select "Yes" for each of the five Valid for select boxes.
- Enter a Description to explain the IP address range.
- Click the Save button.
Enable/Configure OAuth Settings in Salesforce
To retrieve account information from Aria via HTTP OAuth notifications, you must follow the prerequisites and set up the steps below.
Note: To enable/configure OAuth settings in Salesforce, you must be logged into Salesforce as a System Administrator.
Getting Here: Click Setup > Create > Apps

- Click on the Connected Apps New button.

- Complete the following fields within the Basic Information section:
- Enter the name of the connected application in the Connected App Name field.
- Enter the name of the API used when referring to your application from a program in the API Name field.
Note: This field auto-populates, defaulting to a version of the Connected App Name, without spaces.
- Enter an email that Salesforce should use for contacting you or your support team in the Contact Email field.
- Fill in any applicable, non-required fields.

- Complete the following fields within the API (Enable OAuth Settings) section:
- Select the Enable OAuth Settings checkbox under the API (Enable OAuth Settings) section to configure authentication settings.
- Additional fields populate.
- Enter a callback URL (endpoint) in the Callback URL field that Salesforce calls back to your application during OAuth.
Note: The callback URL can be the same value as the "Aria Remote site URL" value specified in the Aria API Configuration, or it can be a placeholder value, such as http://localhost:3000/oauthcallback.html. The callback URL is a mandatory field for the OAuth configuration, but is not used by the Aria for Salesforce app, so it can be any placeholder value.
- Select the Full access (full) option from the Available OAuth Scopes field. Add all other supported OAuth scopes to the Selected OAuth Scopes field.
- These scopes refer to permissions given by the user running the connected application, and are followed by their OAuth token name in parentheses.
- Click the Save button at the bottom of the screen.
The Saved configuration displays as shown below:

- Click on Manage Consumer Details.
Note: Save the Consumer Key and Consumer Secret information. You will need to provide these within Aria's Event Notification settings.
Set Up/Configure Event Notifications through OAuth in Aria
Prerequisites
- Retrieve Consumer Key and Consumer Secret from Salesforce.
Getting Here: Click Configuration > Notifications > Events
Note: See Aria for Salesforce Provisioning Events for a list of event classes/events you can configure in your Aria instance to synchronize data between your Aria instance and your Salesforce.com Aria for Salesforce application.

- Click on the event type for which you want to configure the notification through OAuth (e.g. Accounts, Orders...etc.).

- Click the Step Results tab.
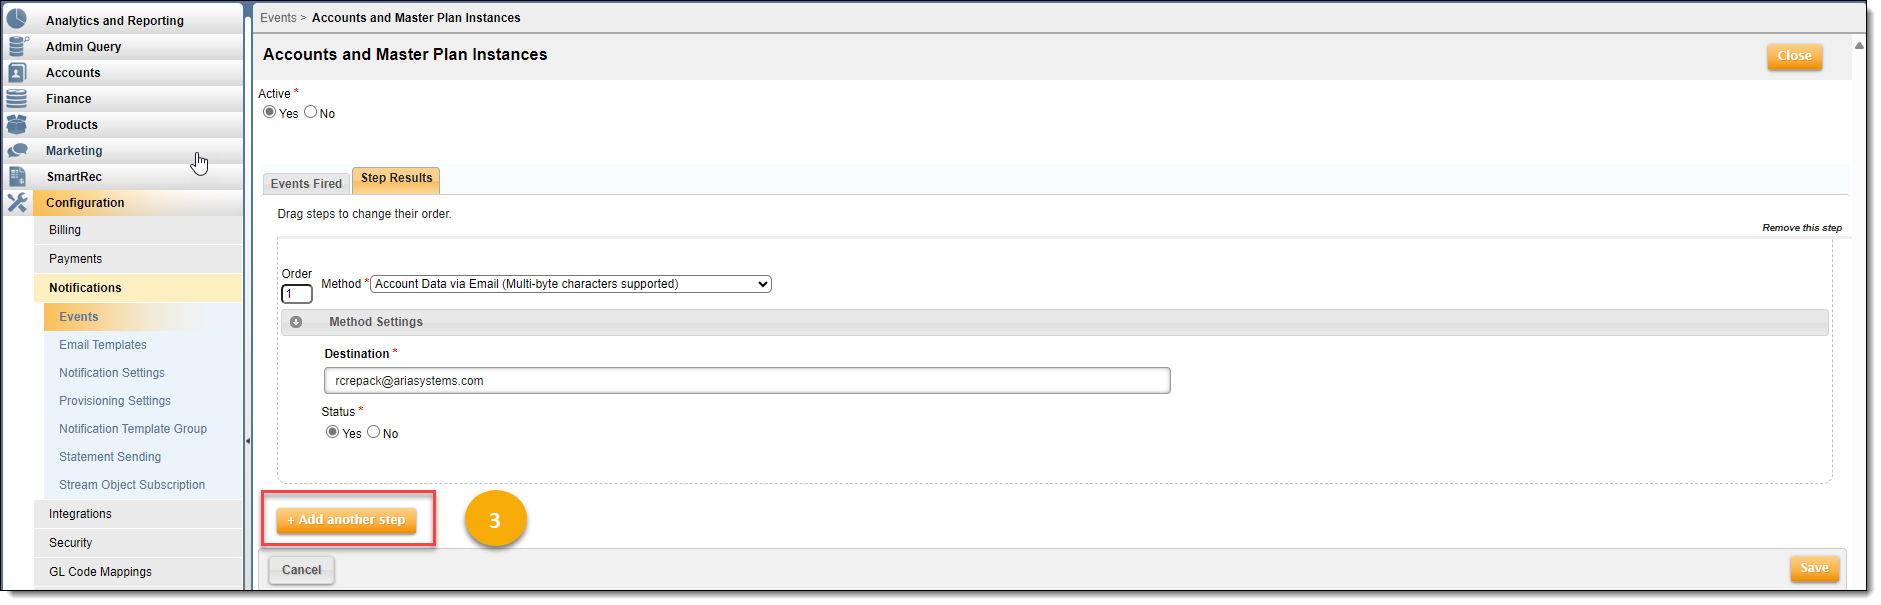
- Click the +Add another step button. A new Step Result form populates.

- Adjust the number in the Order field, if you have multiple steps and would like to rearrange the order.
- Select the SFDC OAuth (XML Document) Method from the Method drop-down. Additional fields populate.
- Complete the following fields:
- Enter your Salesforce login ID in the User ID field.
- Enter your Salesforce password in the Password field.
- Enter the previously generated consumer key in the Consumer Key field.
- Enter the previously generated consumer secret in the Consumer Secret field.
- Enter a Salesforce security token in the Security Token field.
- Enter the endpoint URL in the below format for different instances in the Endpoint URL field.
- For Salesforce Sandbox org: test.salesforce.com/services/apexrest/ASF3/ariaHttpsEventListner
- For Salesforce Production org: login.salesforce.com/services/apexrest/ASF3/ariaHttpsEventListner
- Click Save.